Setting Up WMI on Target Machines Without Administrator Access
vScope can inventory Windows OS machines, including Hyper-V and VMM, using the WMI protocol. Although using a local administrator account is the simplest way to set up WMI, this guide will walk you through setting up WMI access for an Active Directory (AD) group, allowing non-administrator users to connect.
Configure WMI Access for AD Group
Section titled “Configure WMI Access for AD Group”This guide provides steps to grant WMI access to an AD group, which can include any domain or local users.
Create an Active Directory Group
Section titled “Create an Active Directory Group”- Create AD Group
- Open Active Directory and create a group called, for example, “WMI Access Users.”
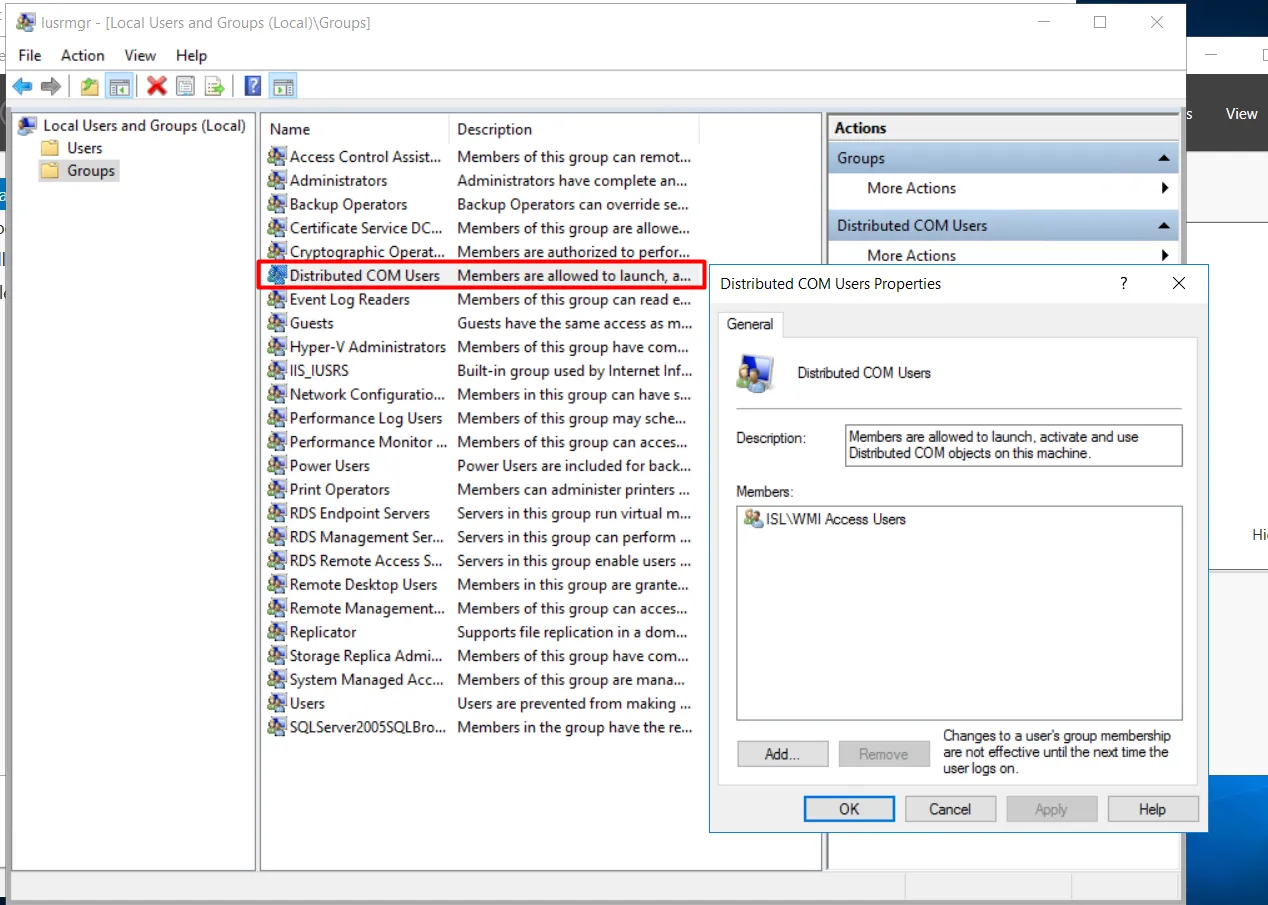
Add the AD Group to the Distributed COM Users Group
Section titled “Add the AD Group to the Distributed COM Users Group”-
Open
lusrmgr.msc. -
Go to Groups.
-
Open Distributed COM Users and add the “WMI Access Users” group.
Configure WMI Permissions
Section titled “Configure WMI Permissions”-
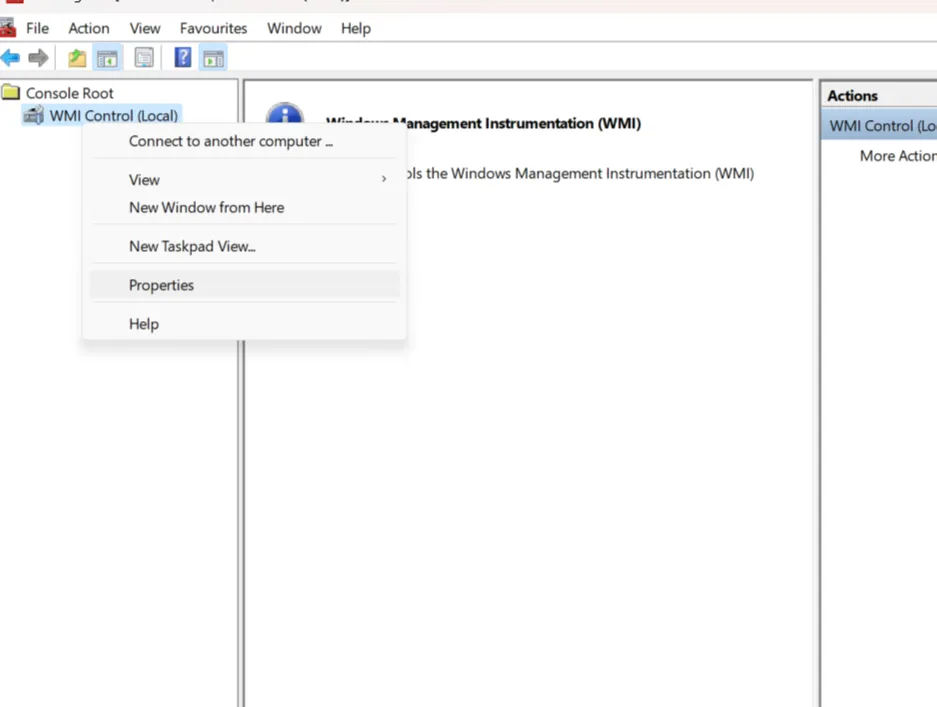
Open
wmimgmt.mscin the command prompt. -
Right-click on WMI Control and select Properties.
-
Go to the Security tab, select Root in the tree, and click Security.
-
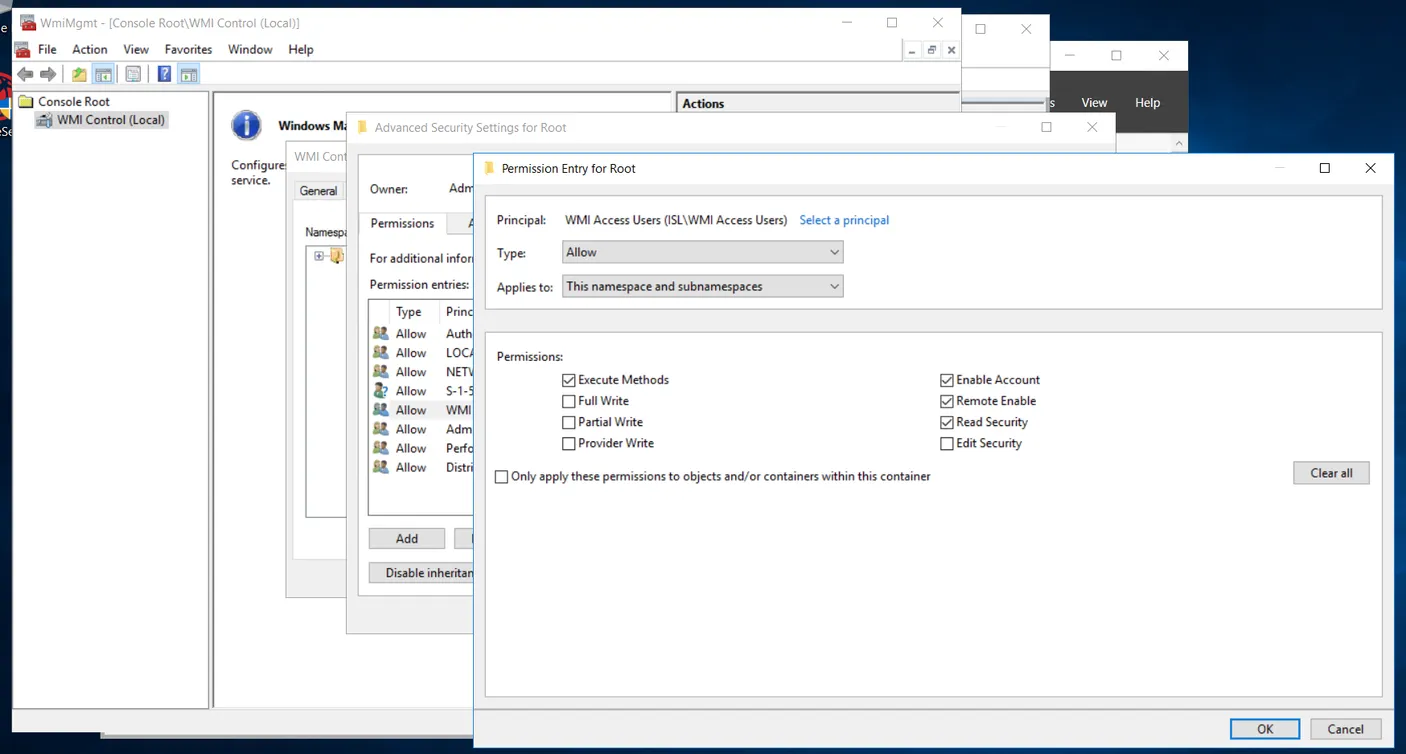
Click Advanced and then Add.
-
Select a Principal and enter the group name, e.g., “WMI Access Users.”
-
Set Applies to to This namespace and subnamespaces and grant permissions for Execute Methods, Enable Account, Remote Enable, and Read Security.
-
Click Apply and OK to save settings.
Configure DCOM Permissions
Section titled “Configure DCOM Permissions”-
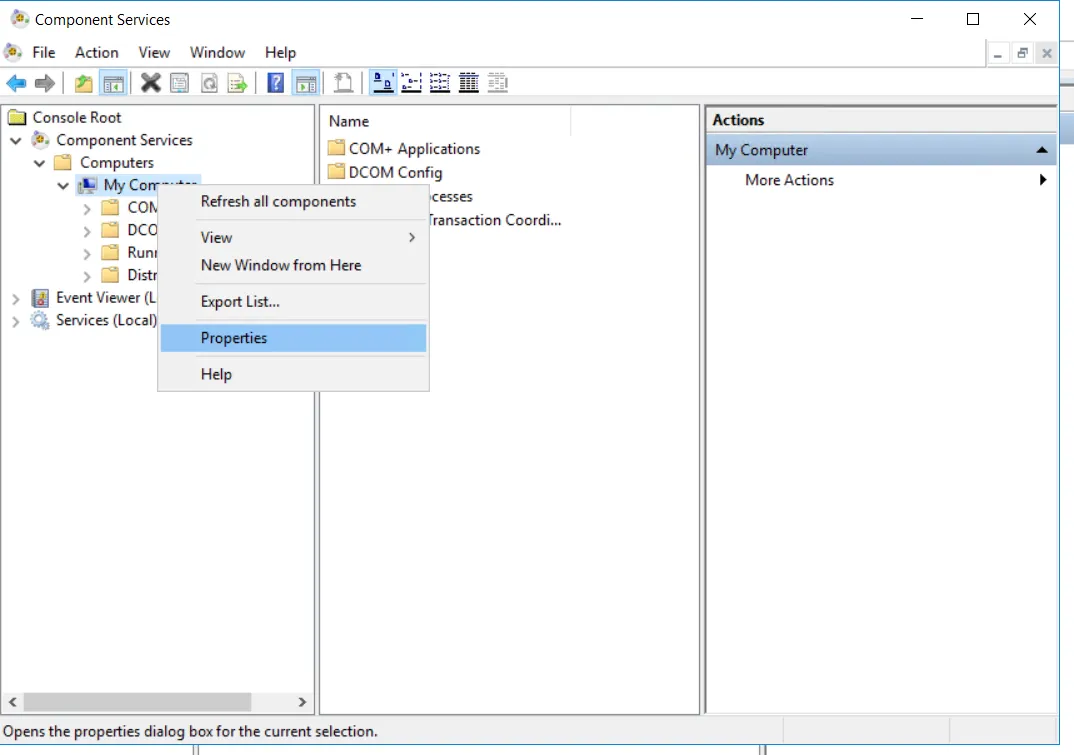
Open
dcomcnfg. -
Expand Component Services > Computers, right-click My Computer, and select Properties.
-
Go to the COM Security tab.
-
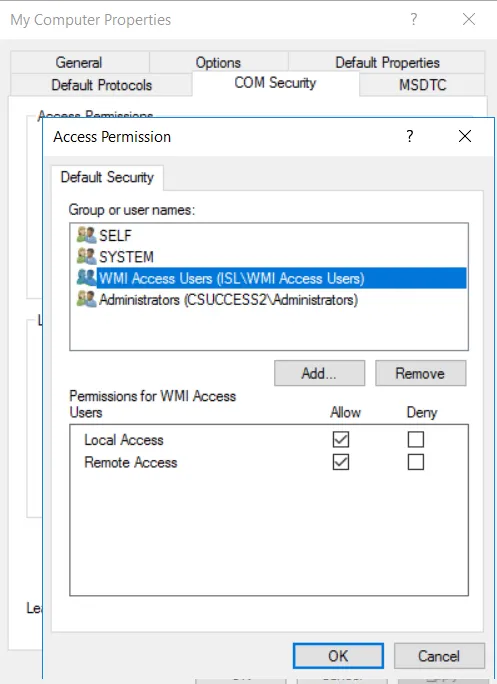
Under Access Permissions and Launch and Activation Permissions, click Edit Default… and add the “WMI Access Users” group, allowing all permissions.
-
Click Apply and OK in all windows to save settings.
Additional Configuration for WMI Access
Section titled “Additional Configuration for WMI Access”If the above steps do not enable WMI, check the following configurations:
Open Firewall for WMI Traffic
Section titled “Open Firewall for WMI Traffic”Run the following command in the command prompt:
netsh advfirewall firewall set rule group="windows management instrumentation (wmi)" new enable=yesDisable User Account Control (UAC) for Remote Access
Section titled “Disable User Account Control (UAC) for Remote Access”Disabling UAC for remote access can help vScope access certain information on the target machine more effectively. However, please note that this setting affects security, as it changes how Windows manages access tokens for remote connections.
-
Open the Registry Editor (
regedit). -
Navigate to the following key:
HKEY_LOCAL_MACHINE\SOFTWARE\Microsoft\Windows\CurrentVersion\Policies\System -
Locate the
LocalAccountTokenFilterPolicykey. If it does not exist, you will need to create it:
- Right-click on System in the left pane.
- Select New > DWORD (32-bit) Value.
- Name the new value
LocalAccountTokenFilterPolicy.
- Double-click
LocalAccountTokenFilterPolicyand set its value to1:
- 0 = Enables Remote UAC filtering (default).
- 1 = Disables Remote UAC filtering.
- Close the Registry Editor.
By setting this key to 1, you disable the UAC token filtering for remote connections, allowing vScope to retrieve information from target machines more freely. Keep in mind, however, that disabling UAC for remote access can lower the security of the target machine, so it should be used cautiously and monitored.
For more details, refer to Microsoft’s documentation on User Account Control and Remote Restrictions.