Enabling WinRM on Windows Servers and Clients
WinRM (Windows Remote Management) is a Microsoft implementation of the WS-Management protocol, providing secure communication and remote management for Windows systems. Utilizing WinRM in vScope allows for comprehensive and efficient system inventory, especially as an alternative to WMI. This guide covers enabling WinRM via a GPO in Active Directory.
Prerequisites for WinRM
Section titled “Prerequisites for WinRM”- Default Availability: Enabled on Windows Server 2012 R2 and newer; disabled on client operating systems earlier than Windows Server 2012.
- Legacy OS Support: For Windows XP and Windows Server 2003, install the Windows Management Framework Core package to enable WinRM.
Enabling WinRM via Group Policy
Section titled “Enabling WinRM via Group Policy”Using Group Policy is the simplest way to enable WinRM on all machines within a domain.
Creating a GPO
Section titled “Creating a GPO”-
On the Active Directory server, open Group Policy Management and create a new GPO linked to your domain.
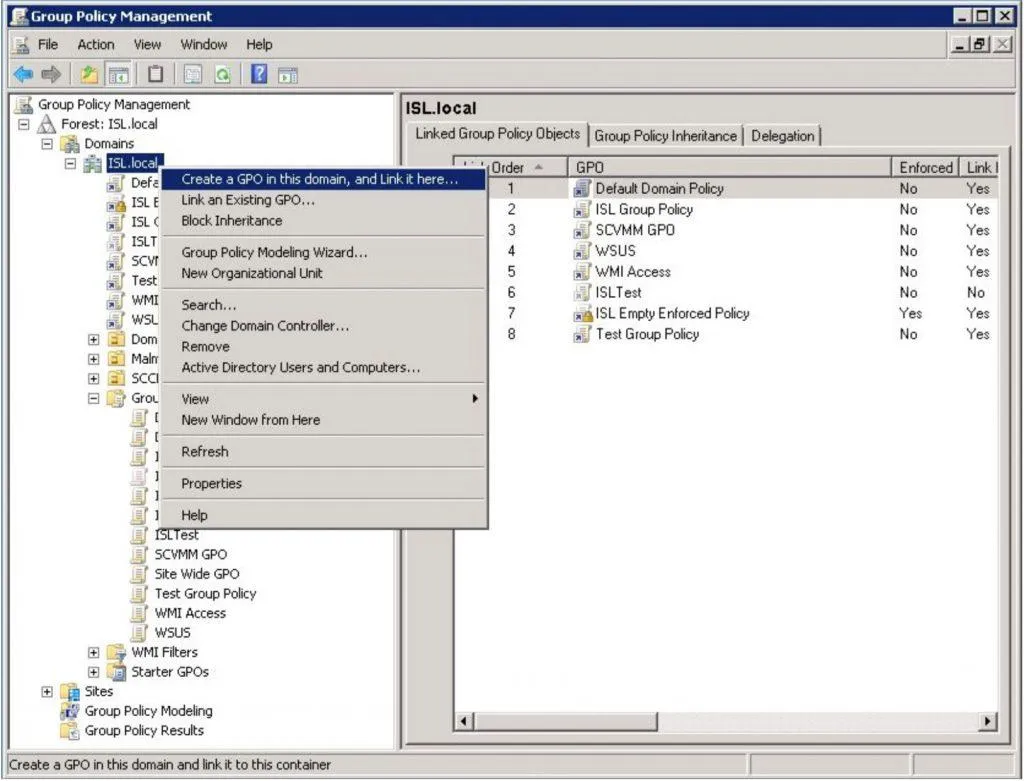
-
Right-click the new GPO and select Edit….
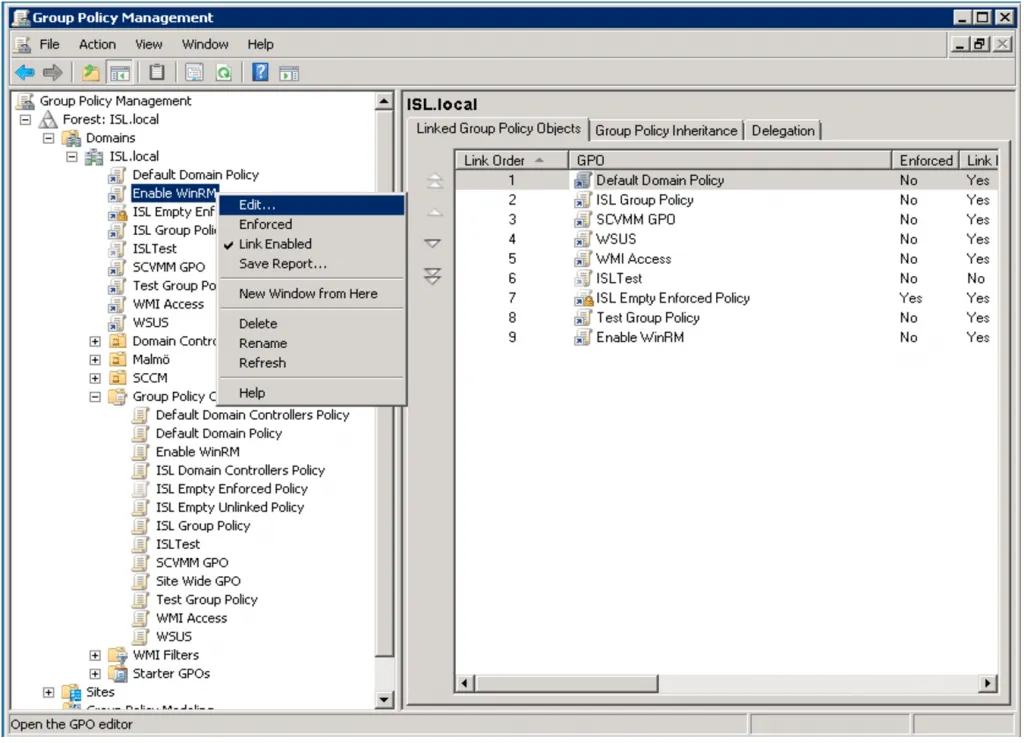
Configuring the WinRM Listener
Section titled “Configuring the WinRM Listener”-
In Group Policy Management Editor, navigate to Computer Configuration > Policies > Administrative Templates > Windows Components > Windows Remote Management (WinRM) > WinRM Service.
-
Edit the Allow automatic configuration of listeners policy setting (may also appear as “Allow remote server management through WinRM”).
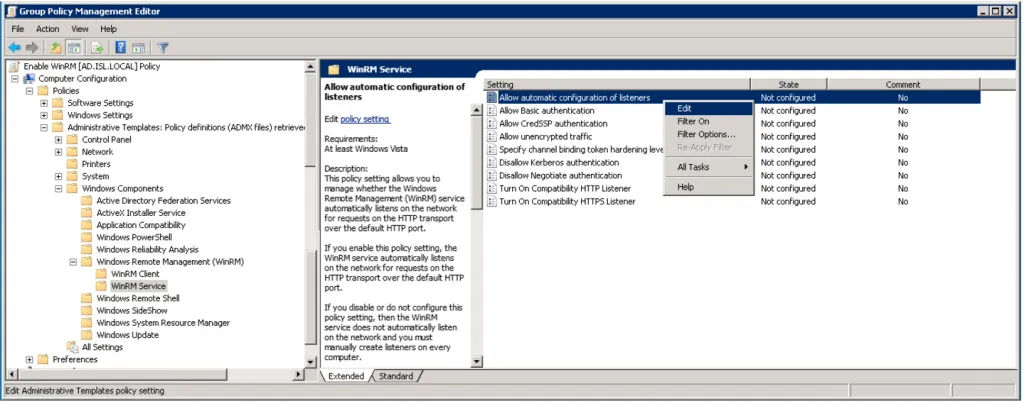
-
Specify which IP addresses the WinRM service will listen on. Setting
*enables listening on all interfaces, which is usually sufficient.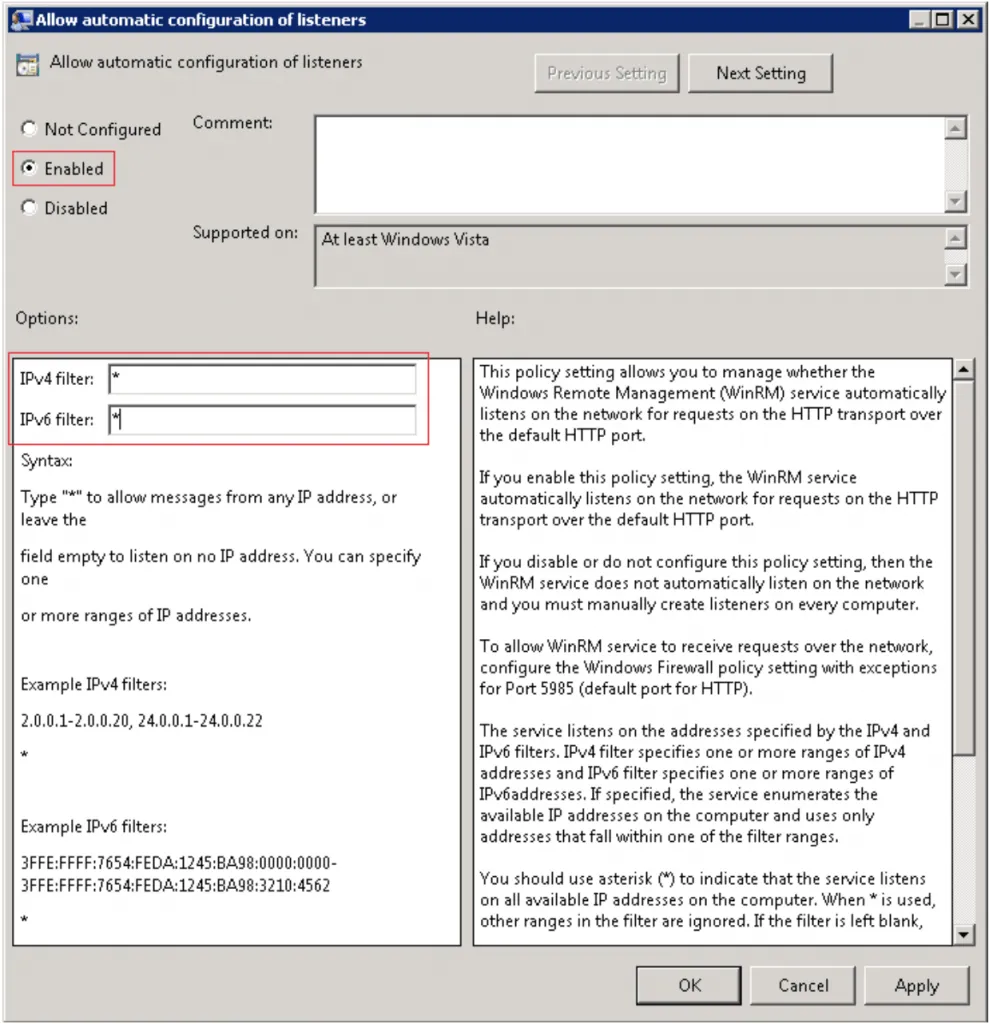
Automatically Starting the WinRM Service
Section titled “Automatically Starting the WinRM Service”-
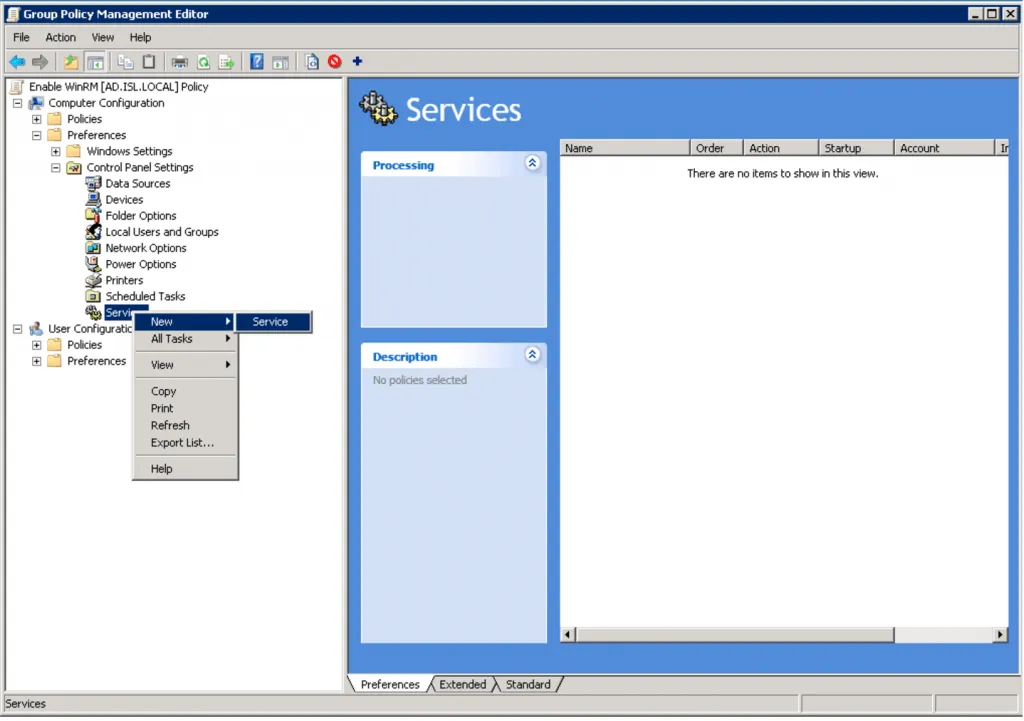
In Group Policy Management Editor, go to Computer Configuration > Preferences > Control Panel Settings > Services.
-
Right-click Services and choose New > Service.
-
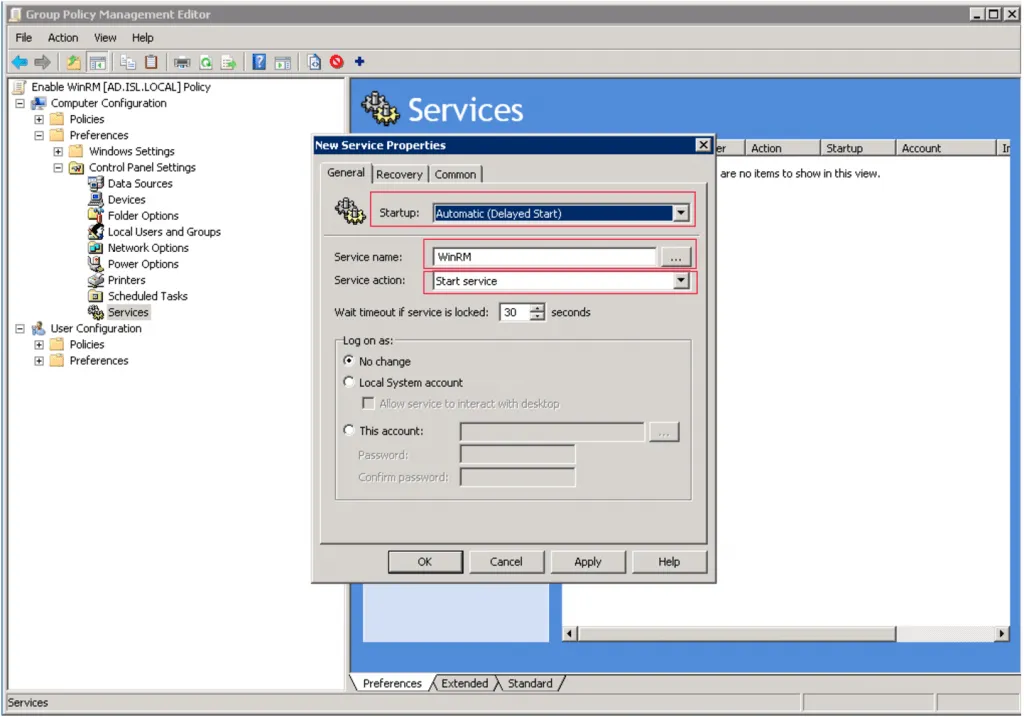
Set Startup to “Automatic (Delayed Start)” and Service action to “Start service.” Click OK to save.
Opening WinRM Ports in the Firewall
Section titled “Opening WinRM Ports in the Firewall”WinRM requires port 5985 for HTTP connections.
-
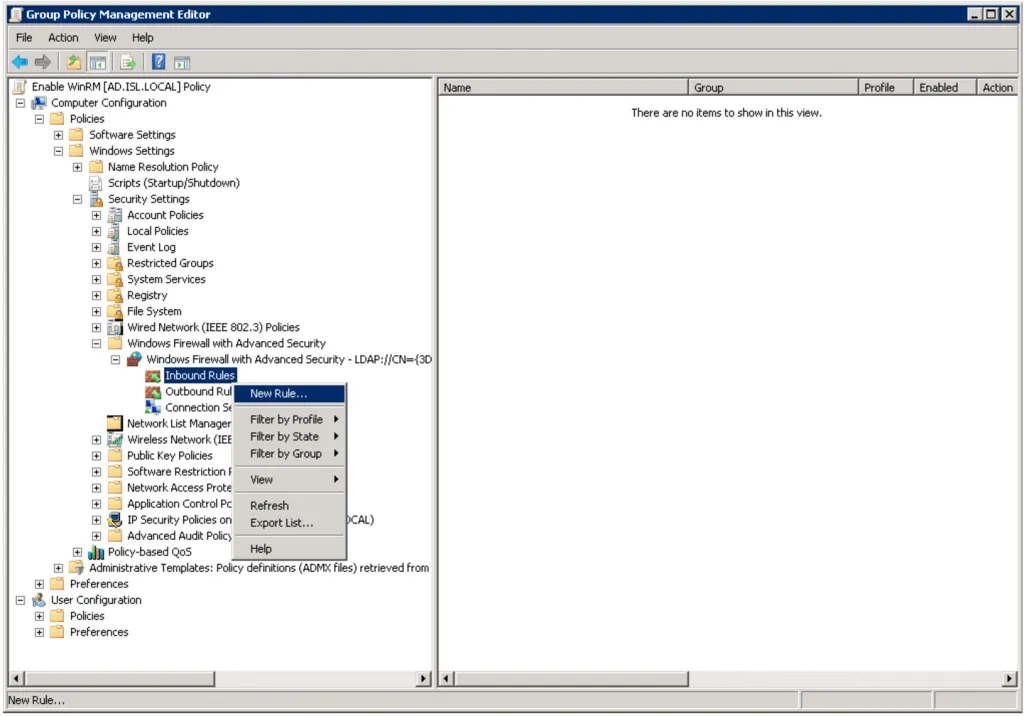
In Group Policy Management Editor, navigate to Computer Configuration > Policies > Windows Settings > Security Settings > Windows Firewall with Advanced Security > Inbound Rules.
-
Right-click Inbound Rules and select New Rule.
-
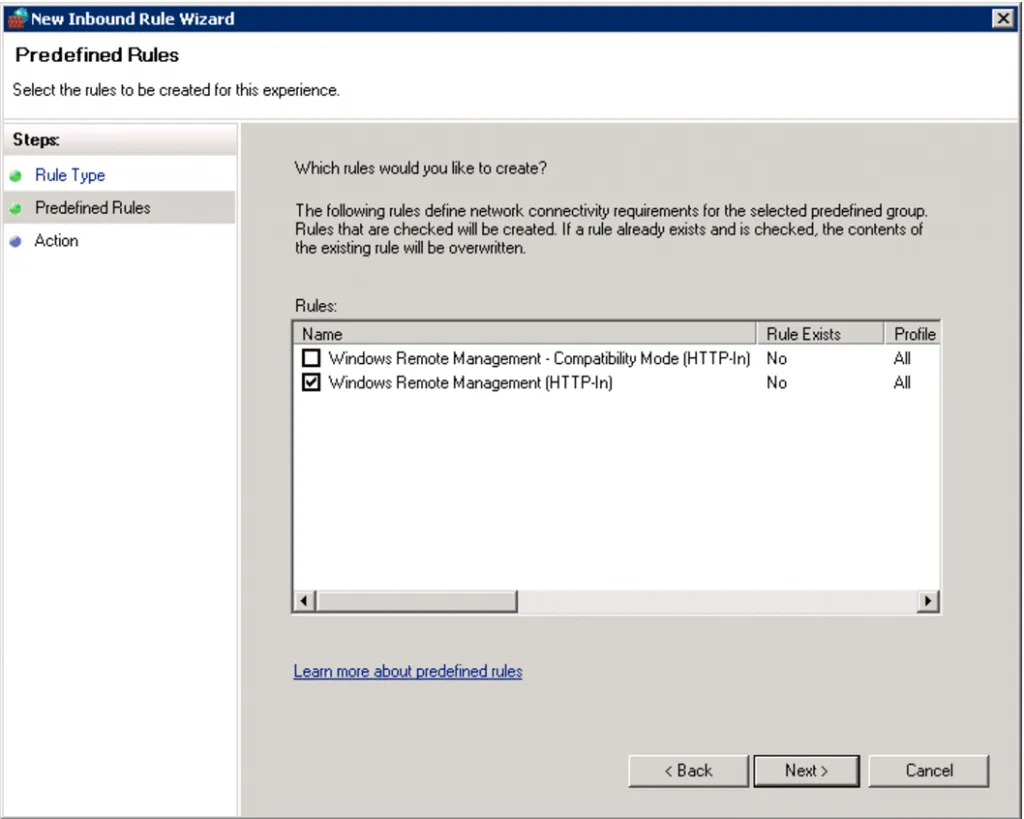
Choose Predefined and select “Windows Remote Management” from the dropdown. Click Next and ensure “Windows Remote Management (HTTP-In)” is selected.
-
Select Allow the connection as the action and click Finish.
Verifying WinRM Settings
Section titled “Verifying WinRM Settings”After configuring the GPO, allow time for the settings to propagate, or use gpupdate /force on target machines to apply them immediately.
- To verify listener settings on a machine, run:
winrm e winrm/config/listenerIf you see output displaying the listener settings, this confirms that WinRM is listening on the intended IP addresses and ports. Ensure that the output matches your configuration, especially if you specified a custom IP address or port.
Testing the Connection with PowerShell
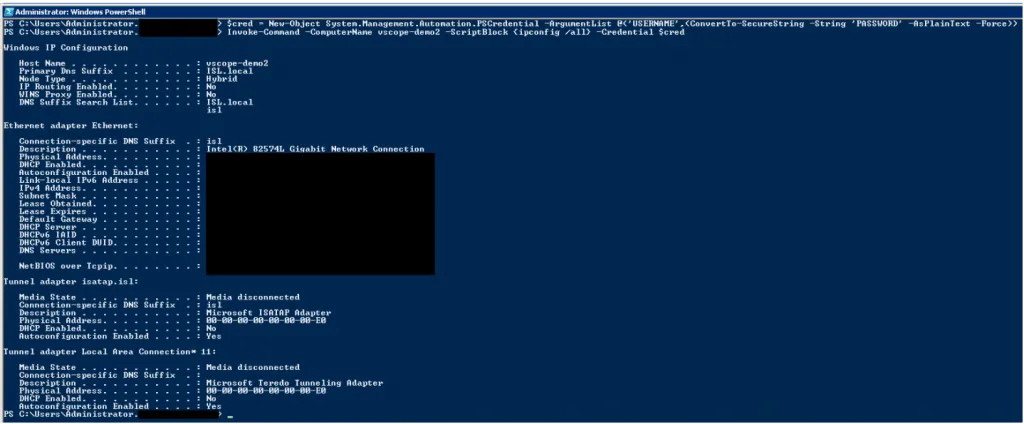
Section titled “Testing the Connection with PowerShell”After setting up WinRM, you can test the connection from a remote machine using PowerShell to verify that everything is configured correctly.
- Create a Credential Object
Use the following command to create a PowerShell credential object. ReplaceUSERNAMEandPASSWORDwith the actual credentials for the remote machine:
$cred = New-Object System.Management.Automation.PSCredential -ArgumentList @('USERNAME', (ConvertTo-SecureString -String 'PASSWORD' -AsPlainText -Force))- Invoke a Remote Command
To confirm the connection, useInvoke-Commandwith the credentials to run a test command on the target machine. In this example,ipconfig /allretrieves network information from the remote machine:
Invoke-Command -ComputerName <target-machine> -ScriptBlock {ipconfig /all} -Credential $credA successful connection will display the network configuration of the remote machine. If the connection fails, check for network or permission issues.
Enabling WinRM in vScope
Section titled “Enabling WinRM in vScope”- Access Discovery Manager in vScope.
- Add a WMI Credential specific to the Windows machines in your environment.
- Under Advanced settings, ensure that Enable WinRM is selected. This activates WinRM over HTTP for inventory collection.
- If HTTPS is configured for added security, select WinRM Use HTTPS.
Verifying the WMI Credential with PowerShell
Section titled “Verifying the WMI Credential with PowerShell”To verify that the WMI credential has the necessary permissions, use the following command from the vScope server (or a proxy server if applicable):
Get-WmiObject -Class Win32_ComputerSystem -ComputerName <target_IP> -Credential <domain\username>After entering the password when prompted, a successful result will display system information for the target machine. Any error messages may indicate permission or connection issues.