Adobe
Integrating Adobe with vScope allows you to view Product Plan assignments, Adobe Users, and Groups. By combining Adobe data with assets from Active Directory, Google Workspace, and Office 365, you’ll gain a more comprehensive view of licensing across your organization. vScope currently supports Service Account (JWT) authentication for Adobe integration.
By following these steps, you’ll enable Adobe integration in vScope, giving you enhanced visibility over Adobe licensing and user data.
Connecting using OAuth
Section titled “Connecting using OAuth”-
Log in to Adobe Developer Console
Go to Adobe Developer Console, choose your organization, and create a new project.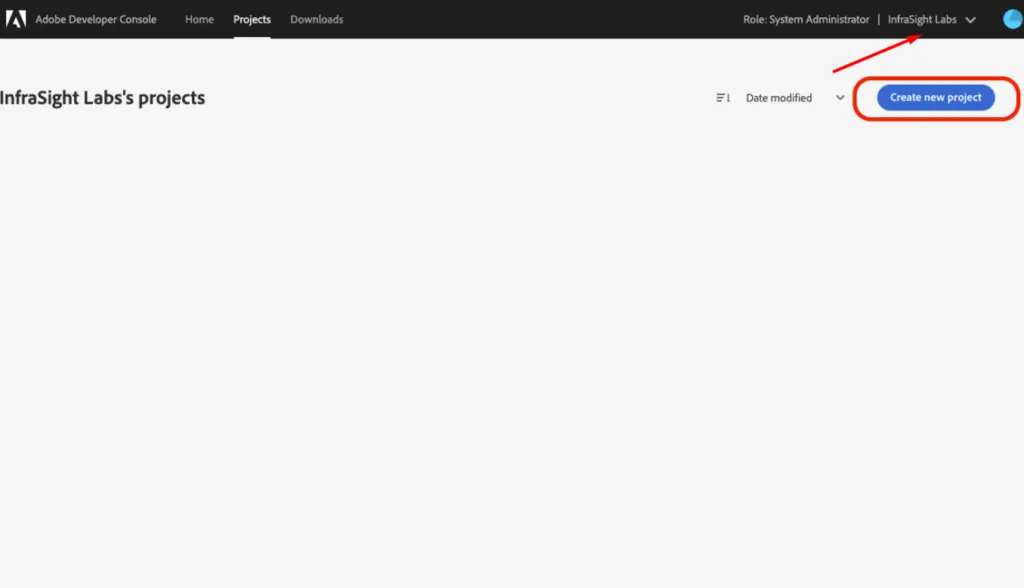
-
Add the API
Select Add API.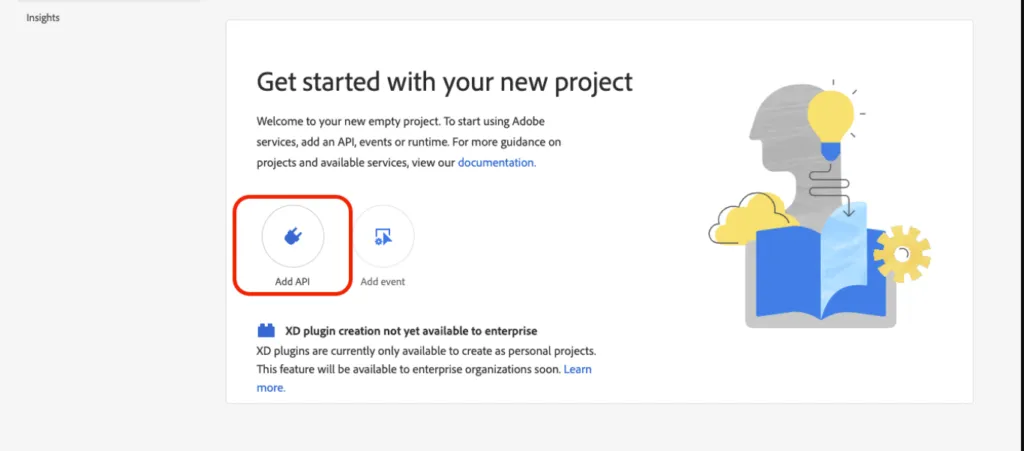
-
Select User Management API
Choose User Management API and click Next.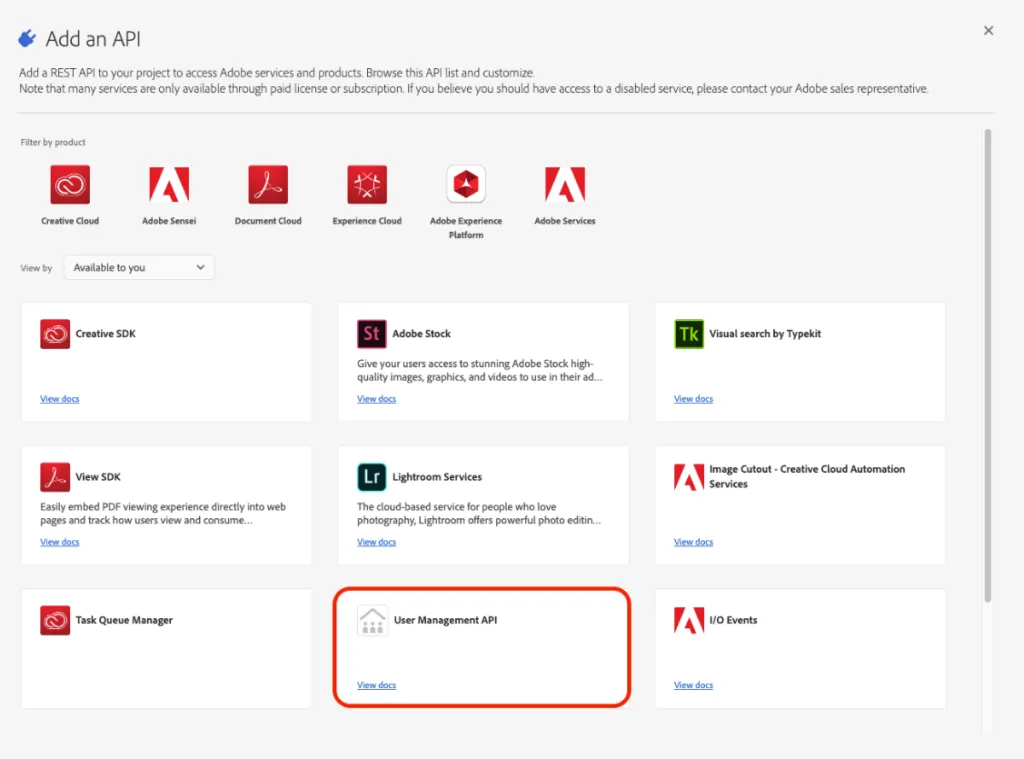
-
Set Authentication Method
Select OAuth Server-to-Server as the authentication method, name your credential, and click Save configured API.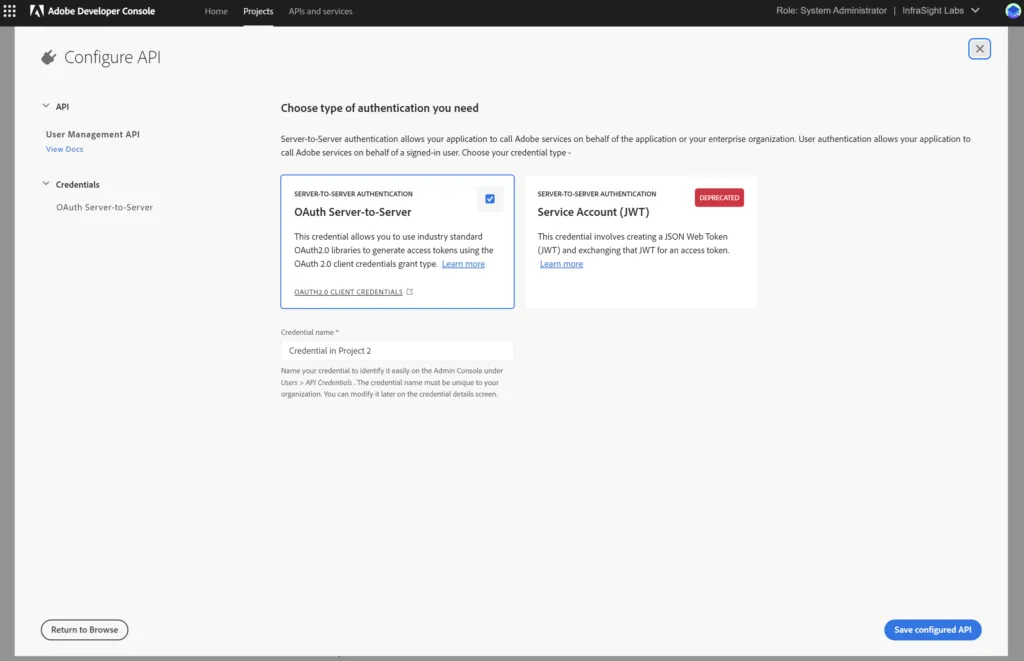
-
Open OAuth Configuration
Click OAuth Server-to-Server.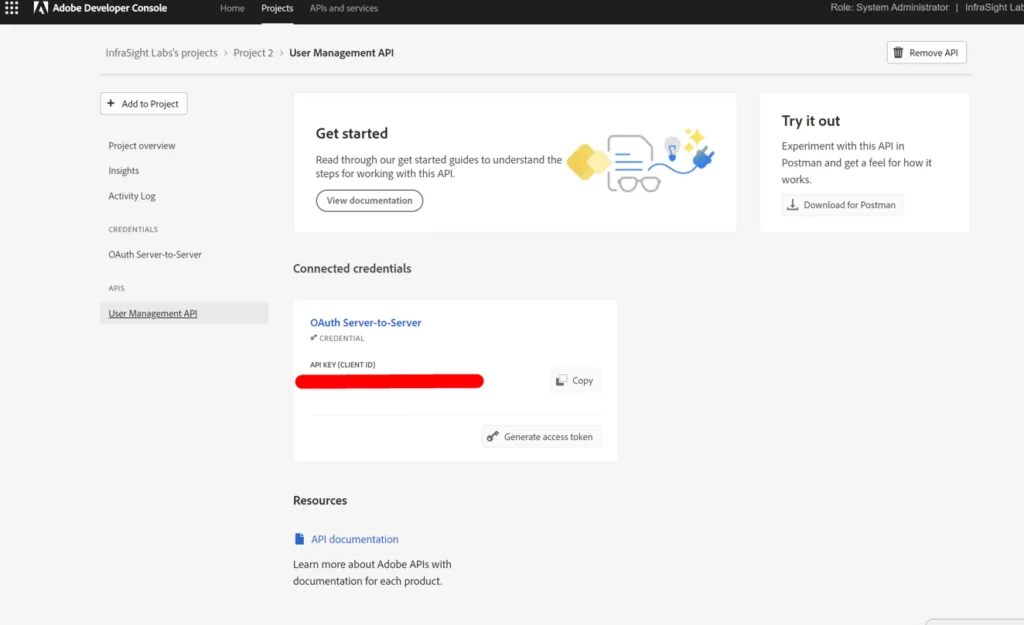
-
Save Client ID and Organization ID
Copy the Client ID and Organization ID to a secure location, then click Retrieve client secret.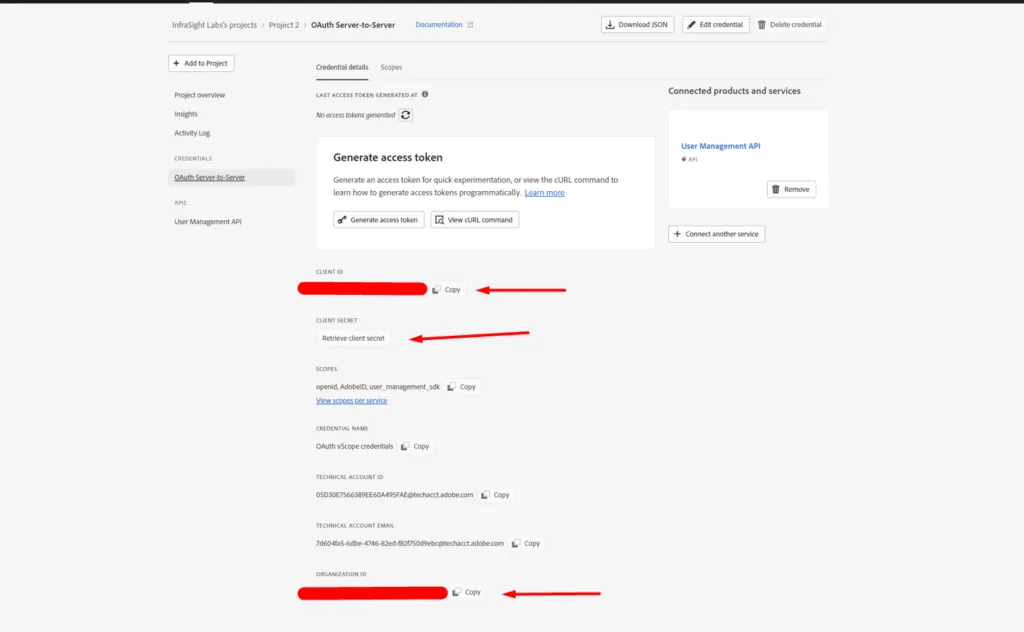
-
Save Client Secret
Copy the Client Secret and store it in the same secure document.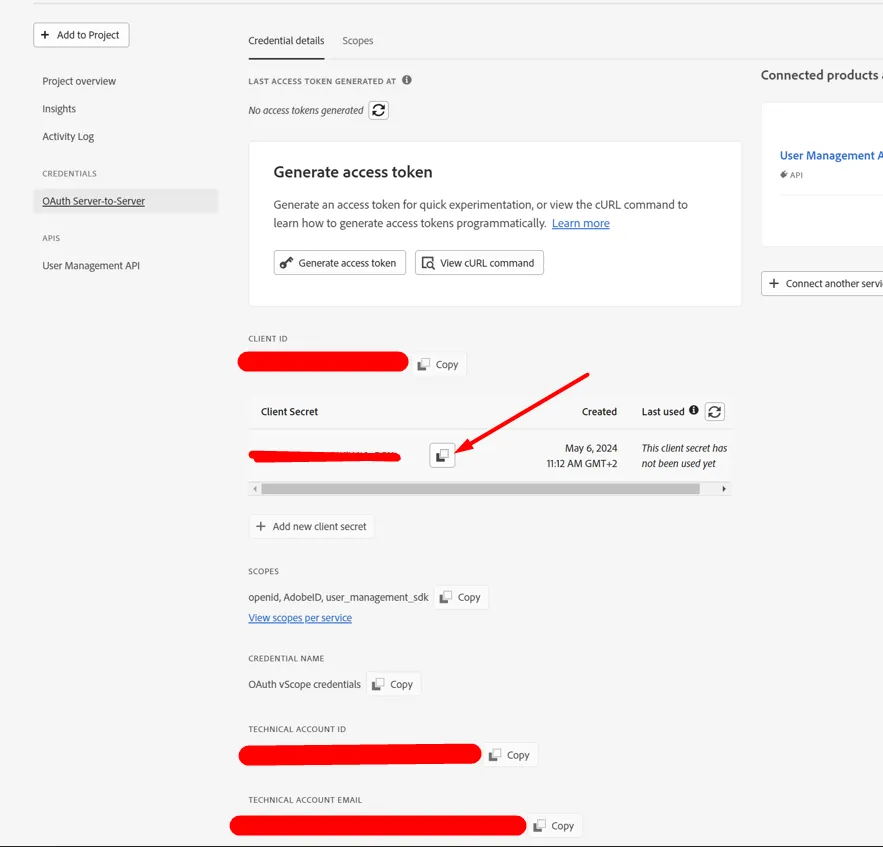
-
Add Credentials in vScope
In vScope, navigate to Discovery > Credentials and add a new credential. Choose Credential type Adobe OAuth Server-to-Server Credential and input the saved details. If setup is correct, testing will show a green check. Save and run a discovery.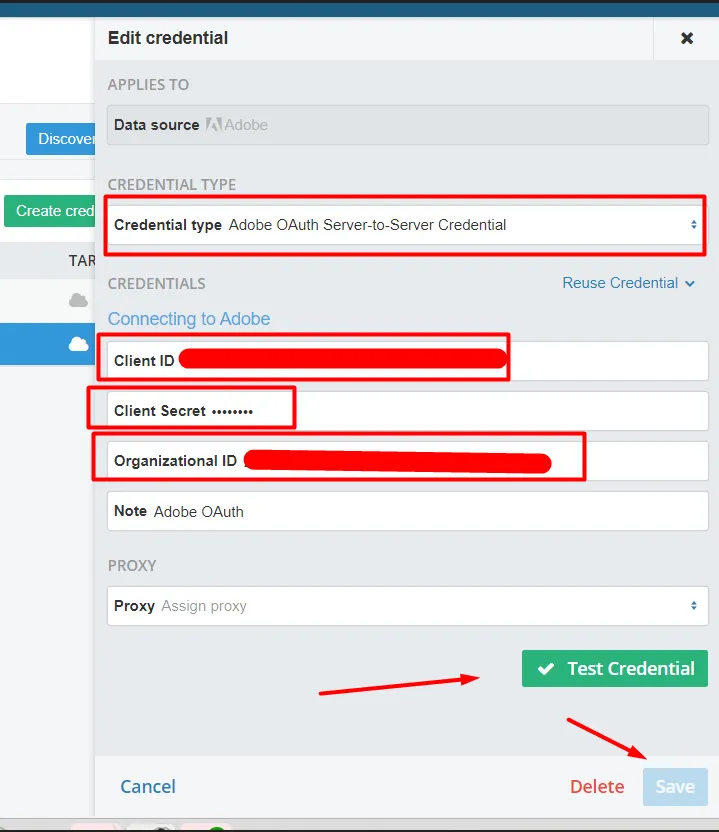
And that’s it! After completing discovery, you can search for “Adobe Licensing” in vScope to access detailed insights about your Adobe licensing.
Connecting using JWT (Deprecated)
Section titled “Connecting using JWT (Deprecated)”-
Log in to Adobe Developer Console.
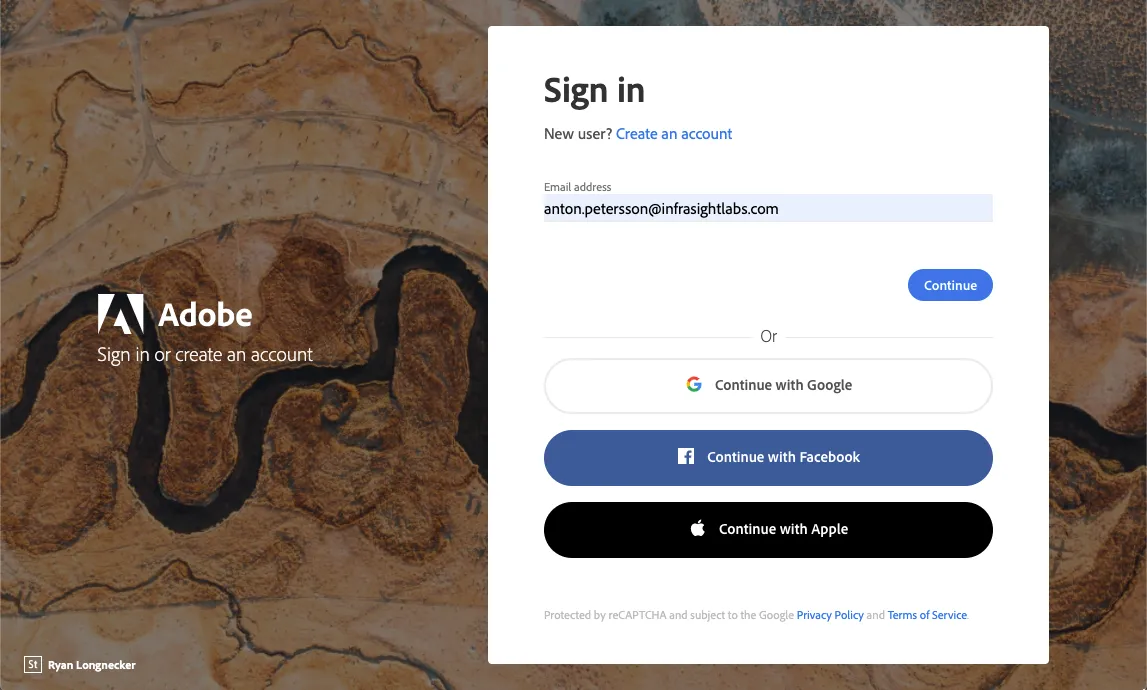
-
In the top right, click the drop-down menu and select your Organization.
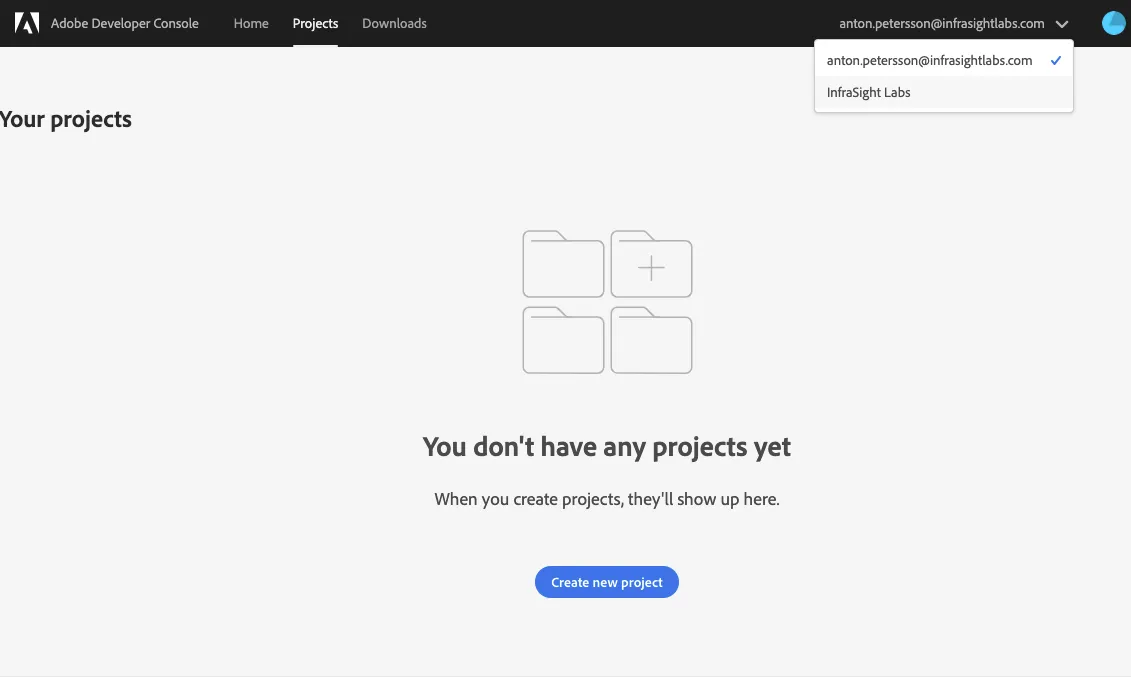
-
Click Create New Project.
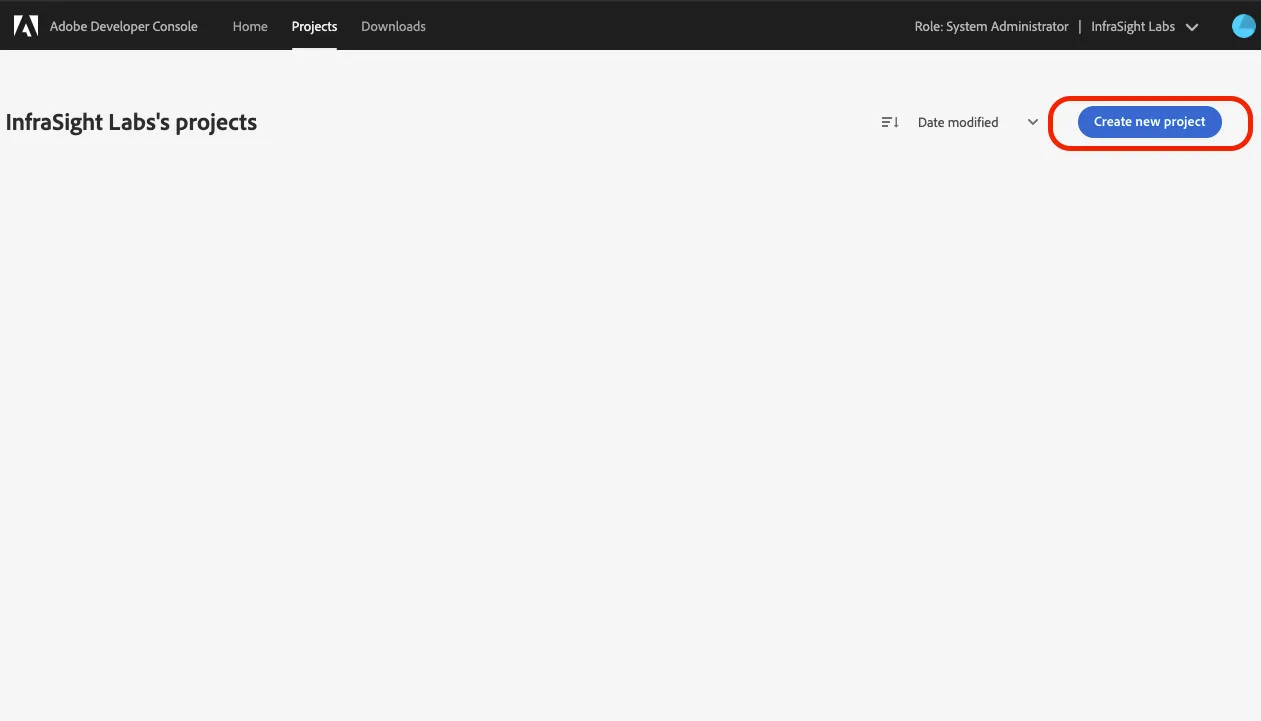
-
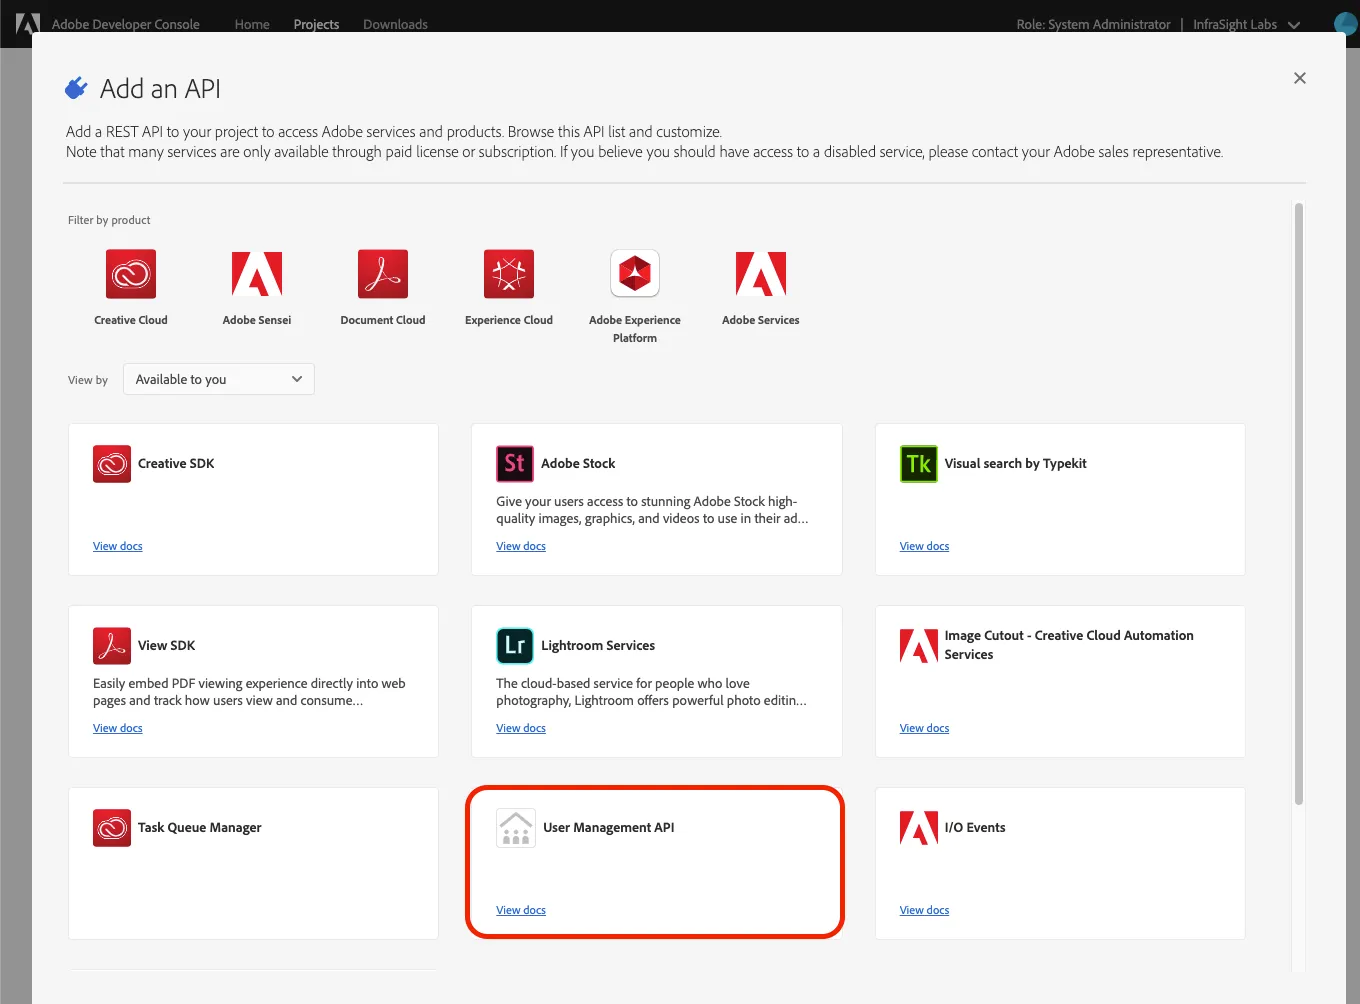
Add API to your project.
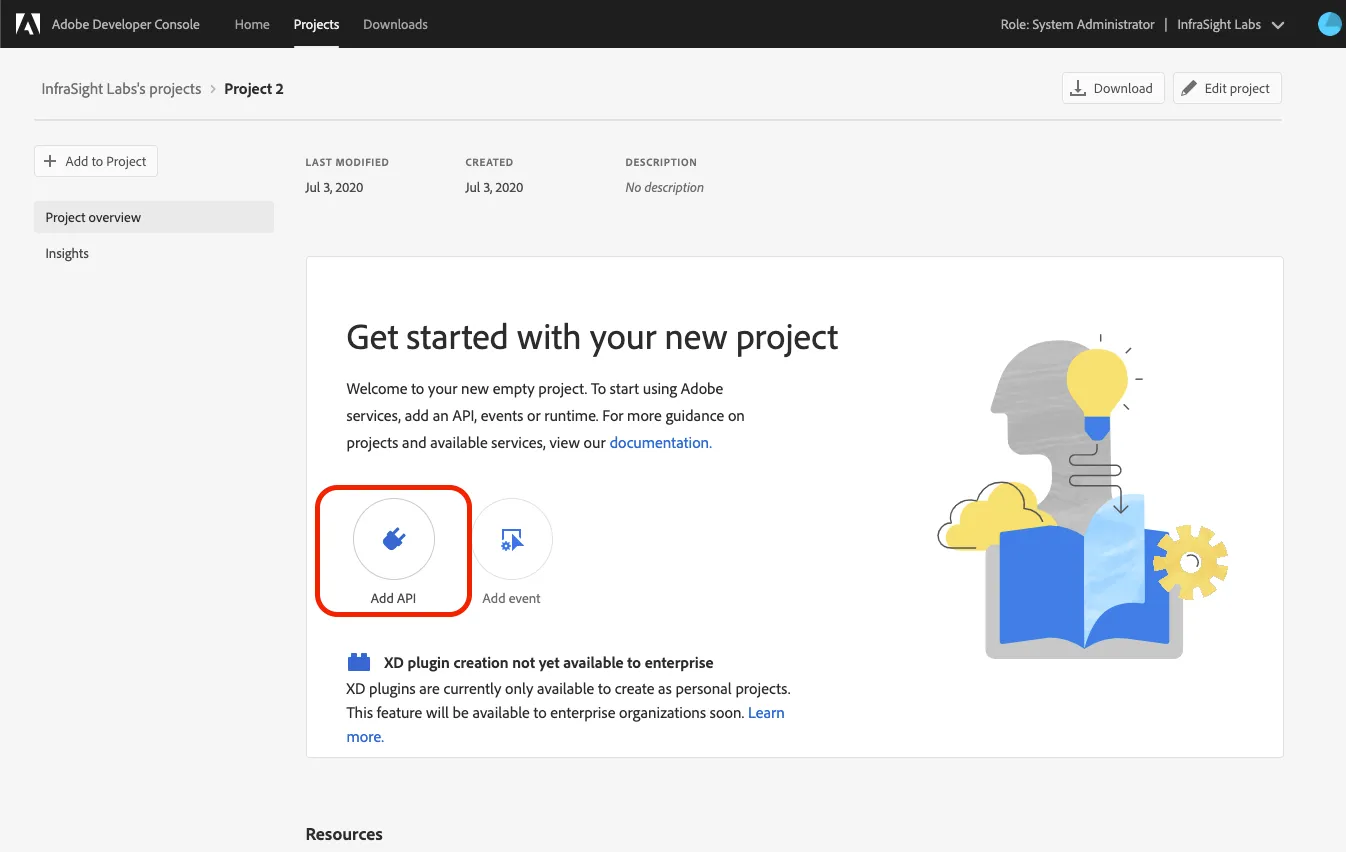
-
Select User Management API and click Next.
-
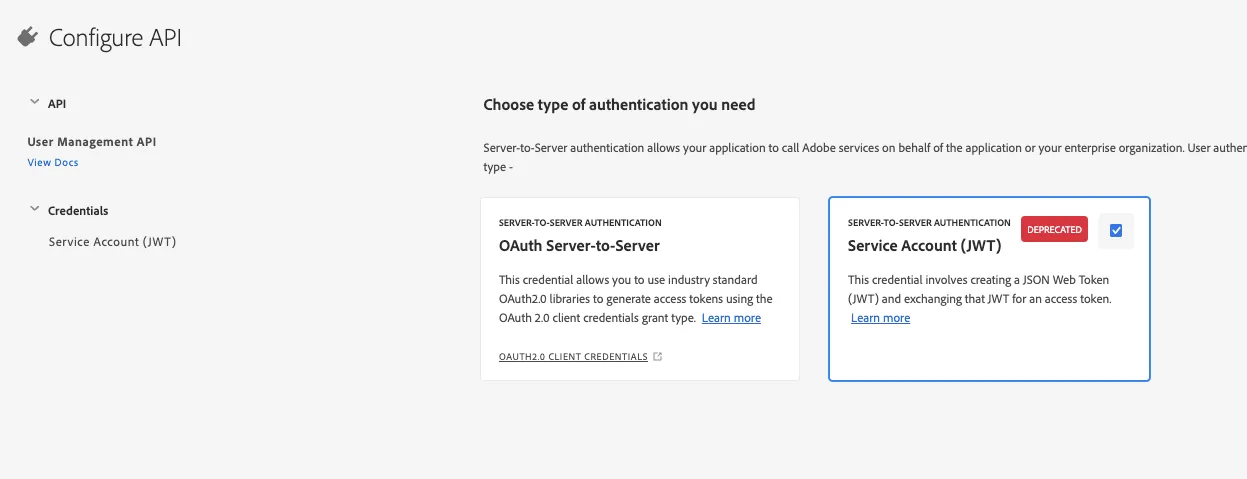
vScope supports Service Account (JWT) authentication. The steps below are specific to this method and do not apply to OAuth Server-to-Server.
-
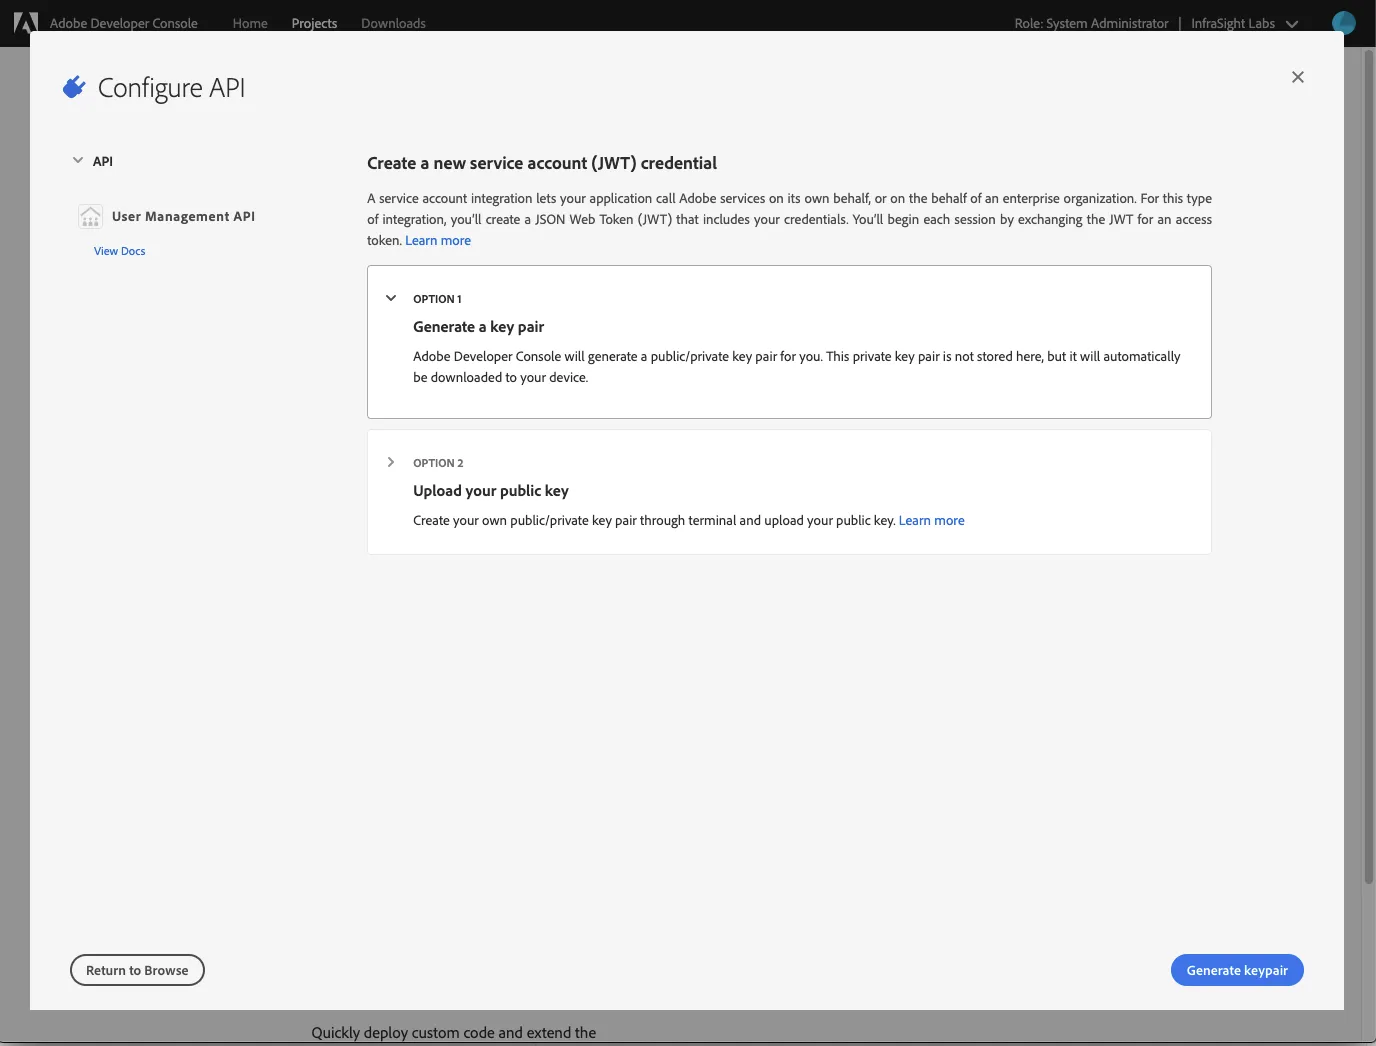
Choose Generate a Key Pair as the authentication option.
-
Download the configuration file
config-adobe.zipand save it for later.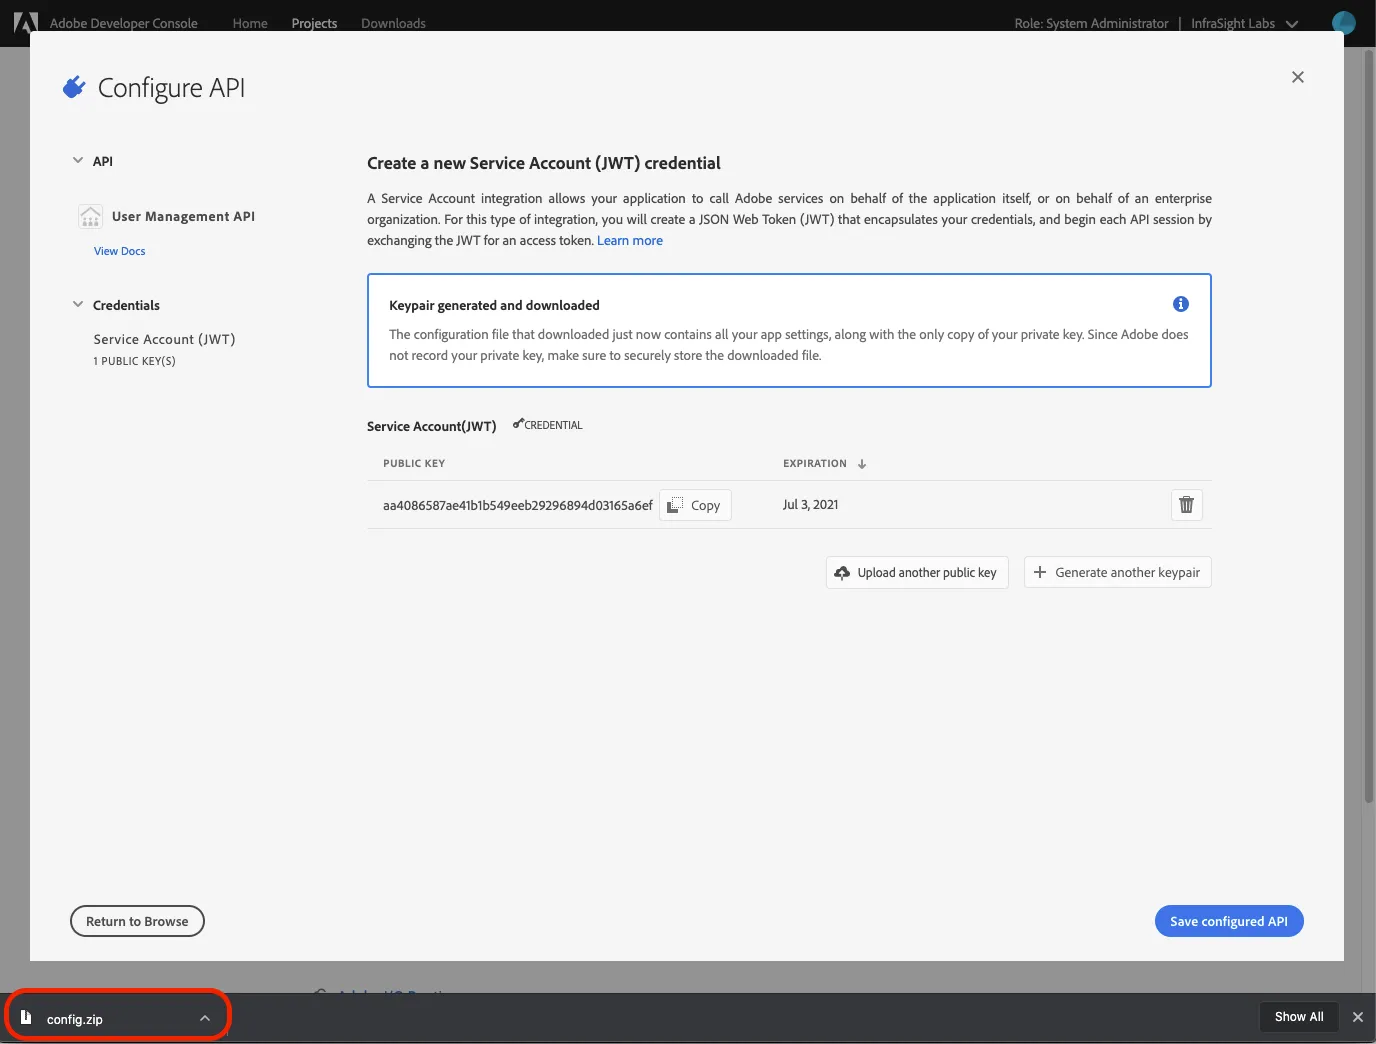
-
Click Save Configured API.
-
In vScope, navigate to Discovery Manager > Credentials > + Credential > Adobe. (Note: Administrator access is required for this step.)
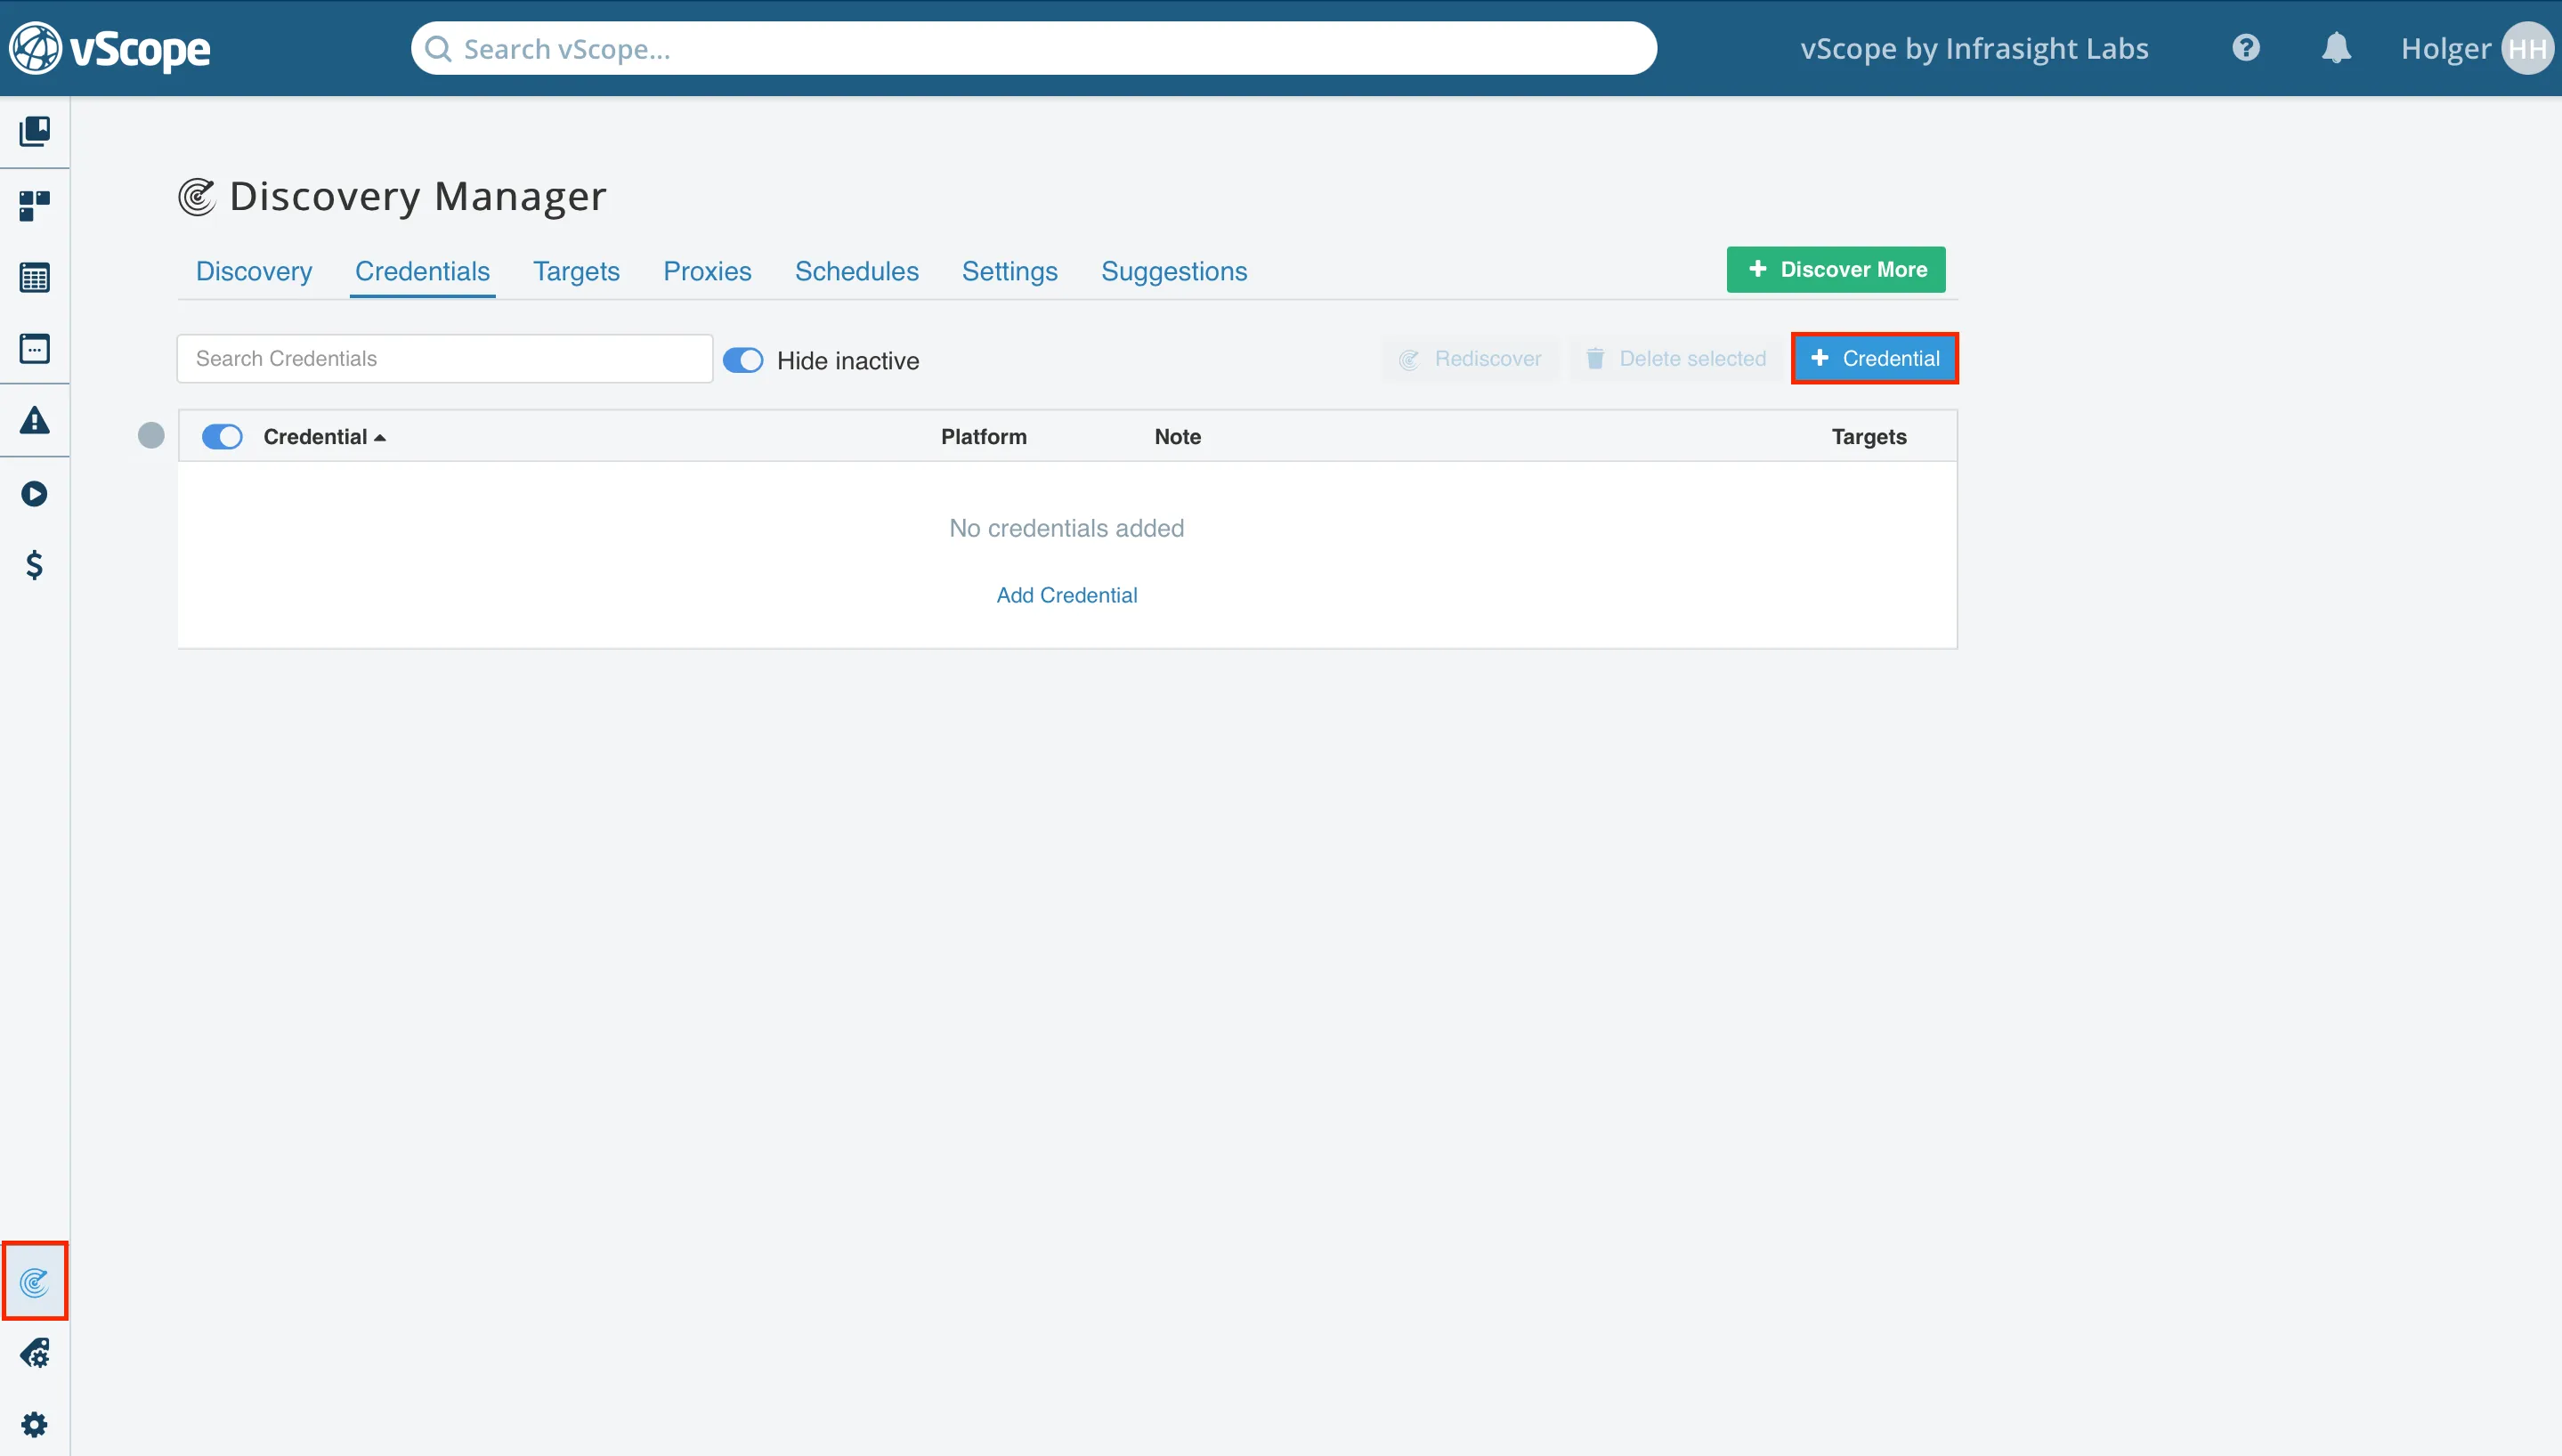
Import Adobe Certificate and Keys into vScope
Section titled “Import Adobe Certificate and Keys into vScope”-
Locate and extract the downloaded
config-adobe.zipfile. -
Open .certificate_pub.crt as a text file (e.g., using Notepad on Windows).
-
Copy the entire contents, including the lines
----BEGIN CERTIFICATE-----and----END CERTIFICATE-----, and paste it into the Certificate field in vScope.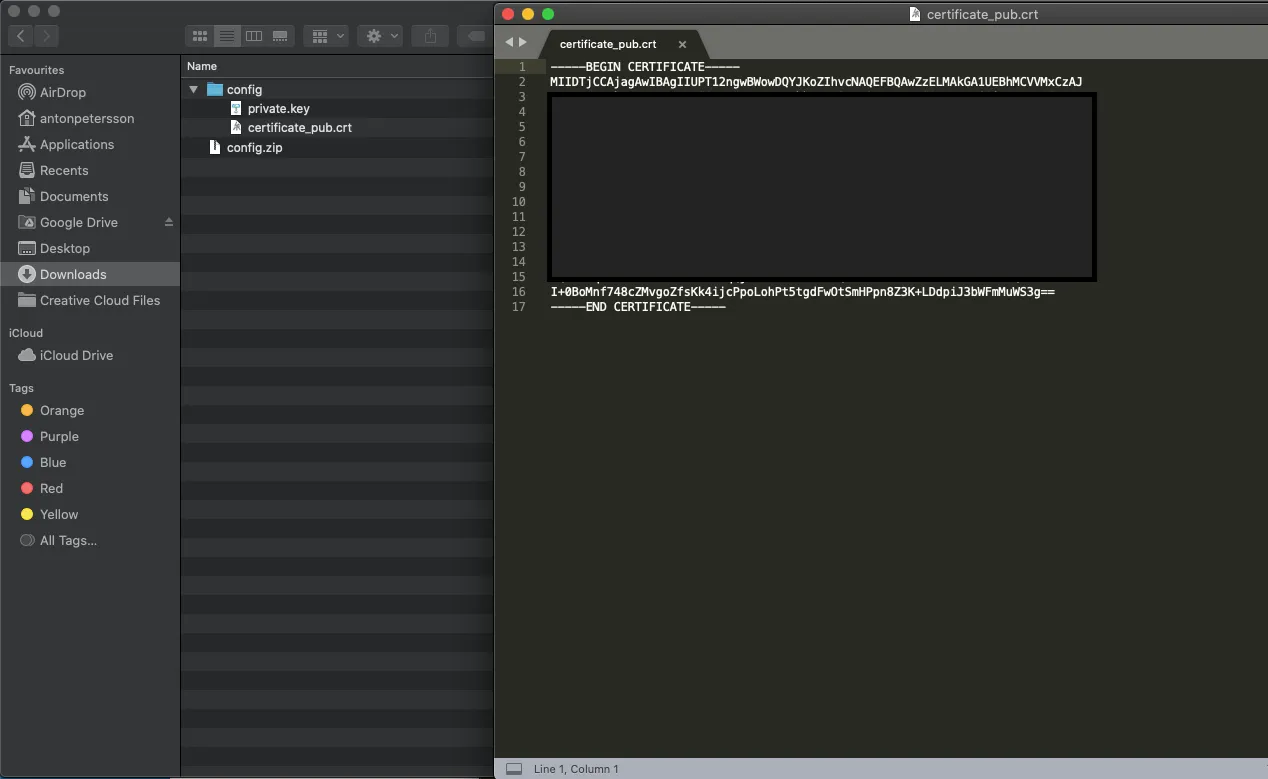
-
Open private.key as a text file (e.g., using Notepad on Windows).
-
Copy the entire contents, including
----BEGIN PRIVATE KEY-----and----END PRIVATE KEY-----, and paste it into the Private Key field in vScope.
Enter Adobe API Credentials in vScope
Section titled “Enter Adobe API Credentials in vScope”-
Go back to the Adobe Developer Console.
-
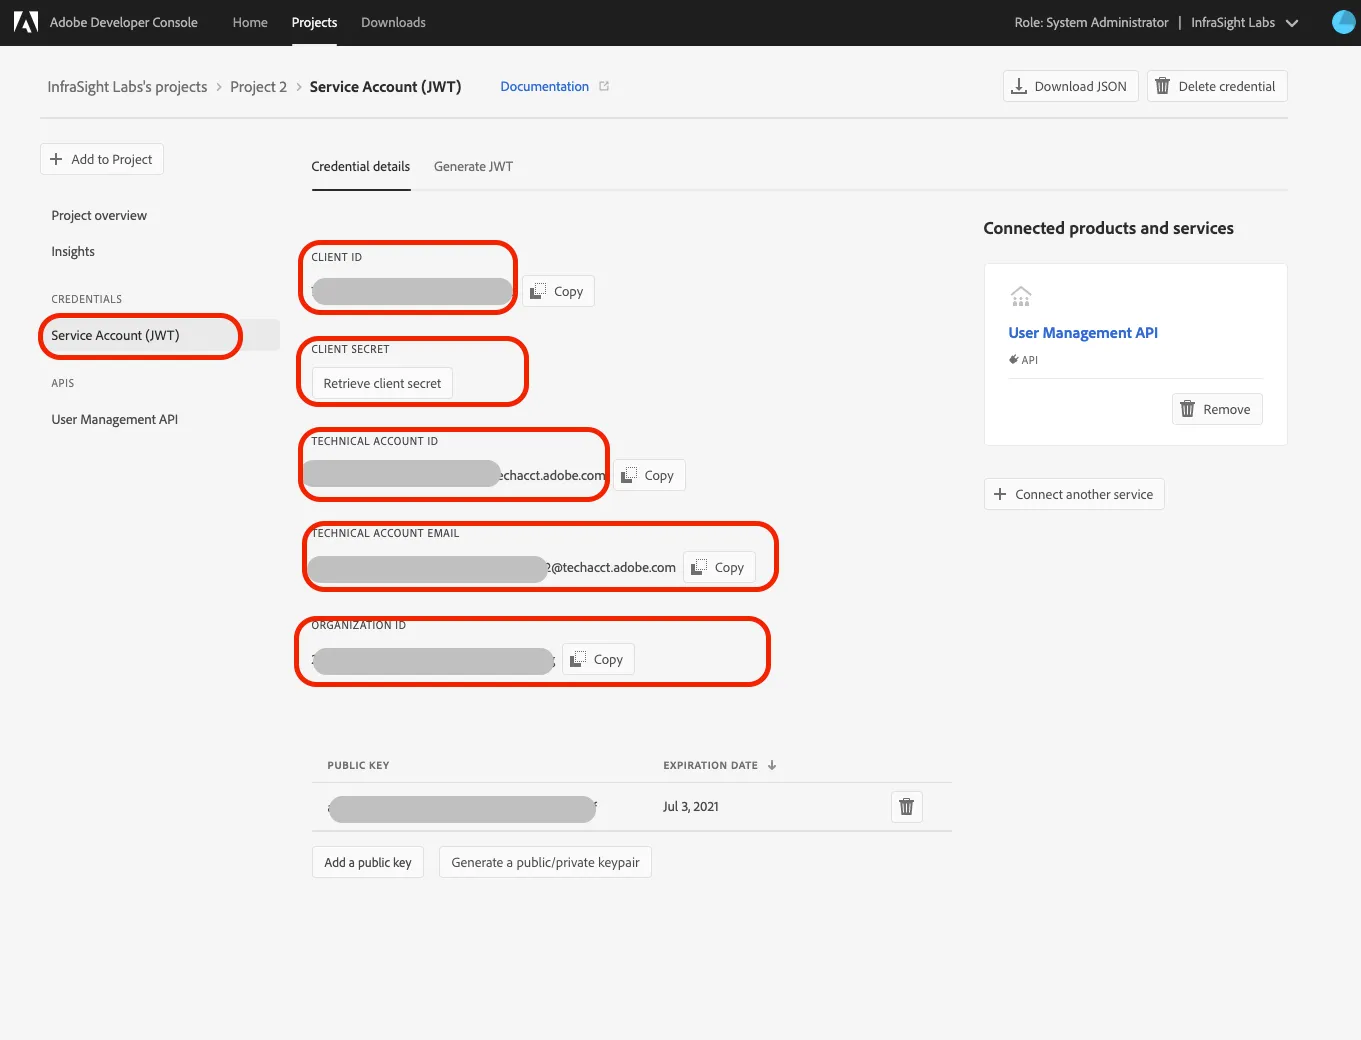
Click on Service Account (JWT).
-
Copy the CLIENT ID and paste it into the Client ID field in vScope.
-
Copy the CLIENT SECRET and paste it into the Client Secret field in vScope.
-
Copy the TECHNICAL ACCOUNT ID and paste it into the Technical Account ID field in vScope.
-
Copy the ORGANIZATION ID and paste it into the Organization ID field in vScope.
-
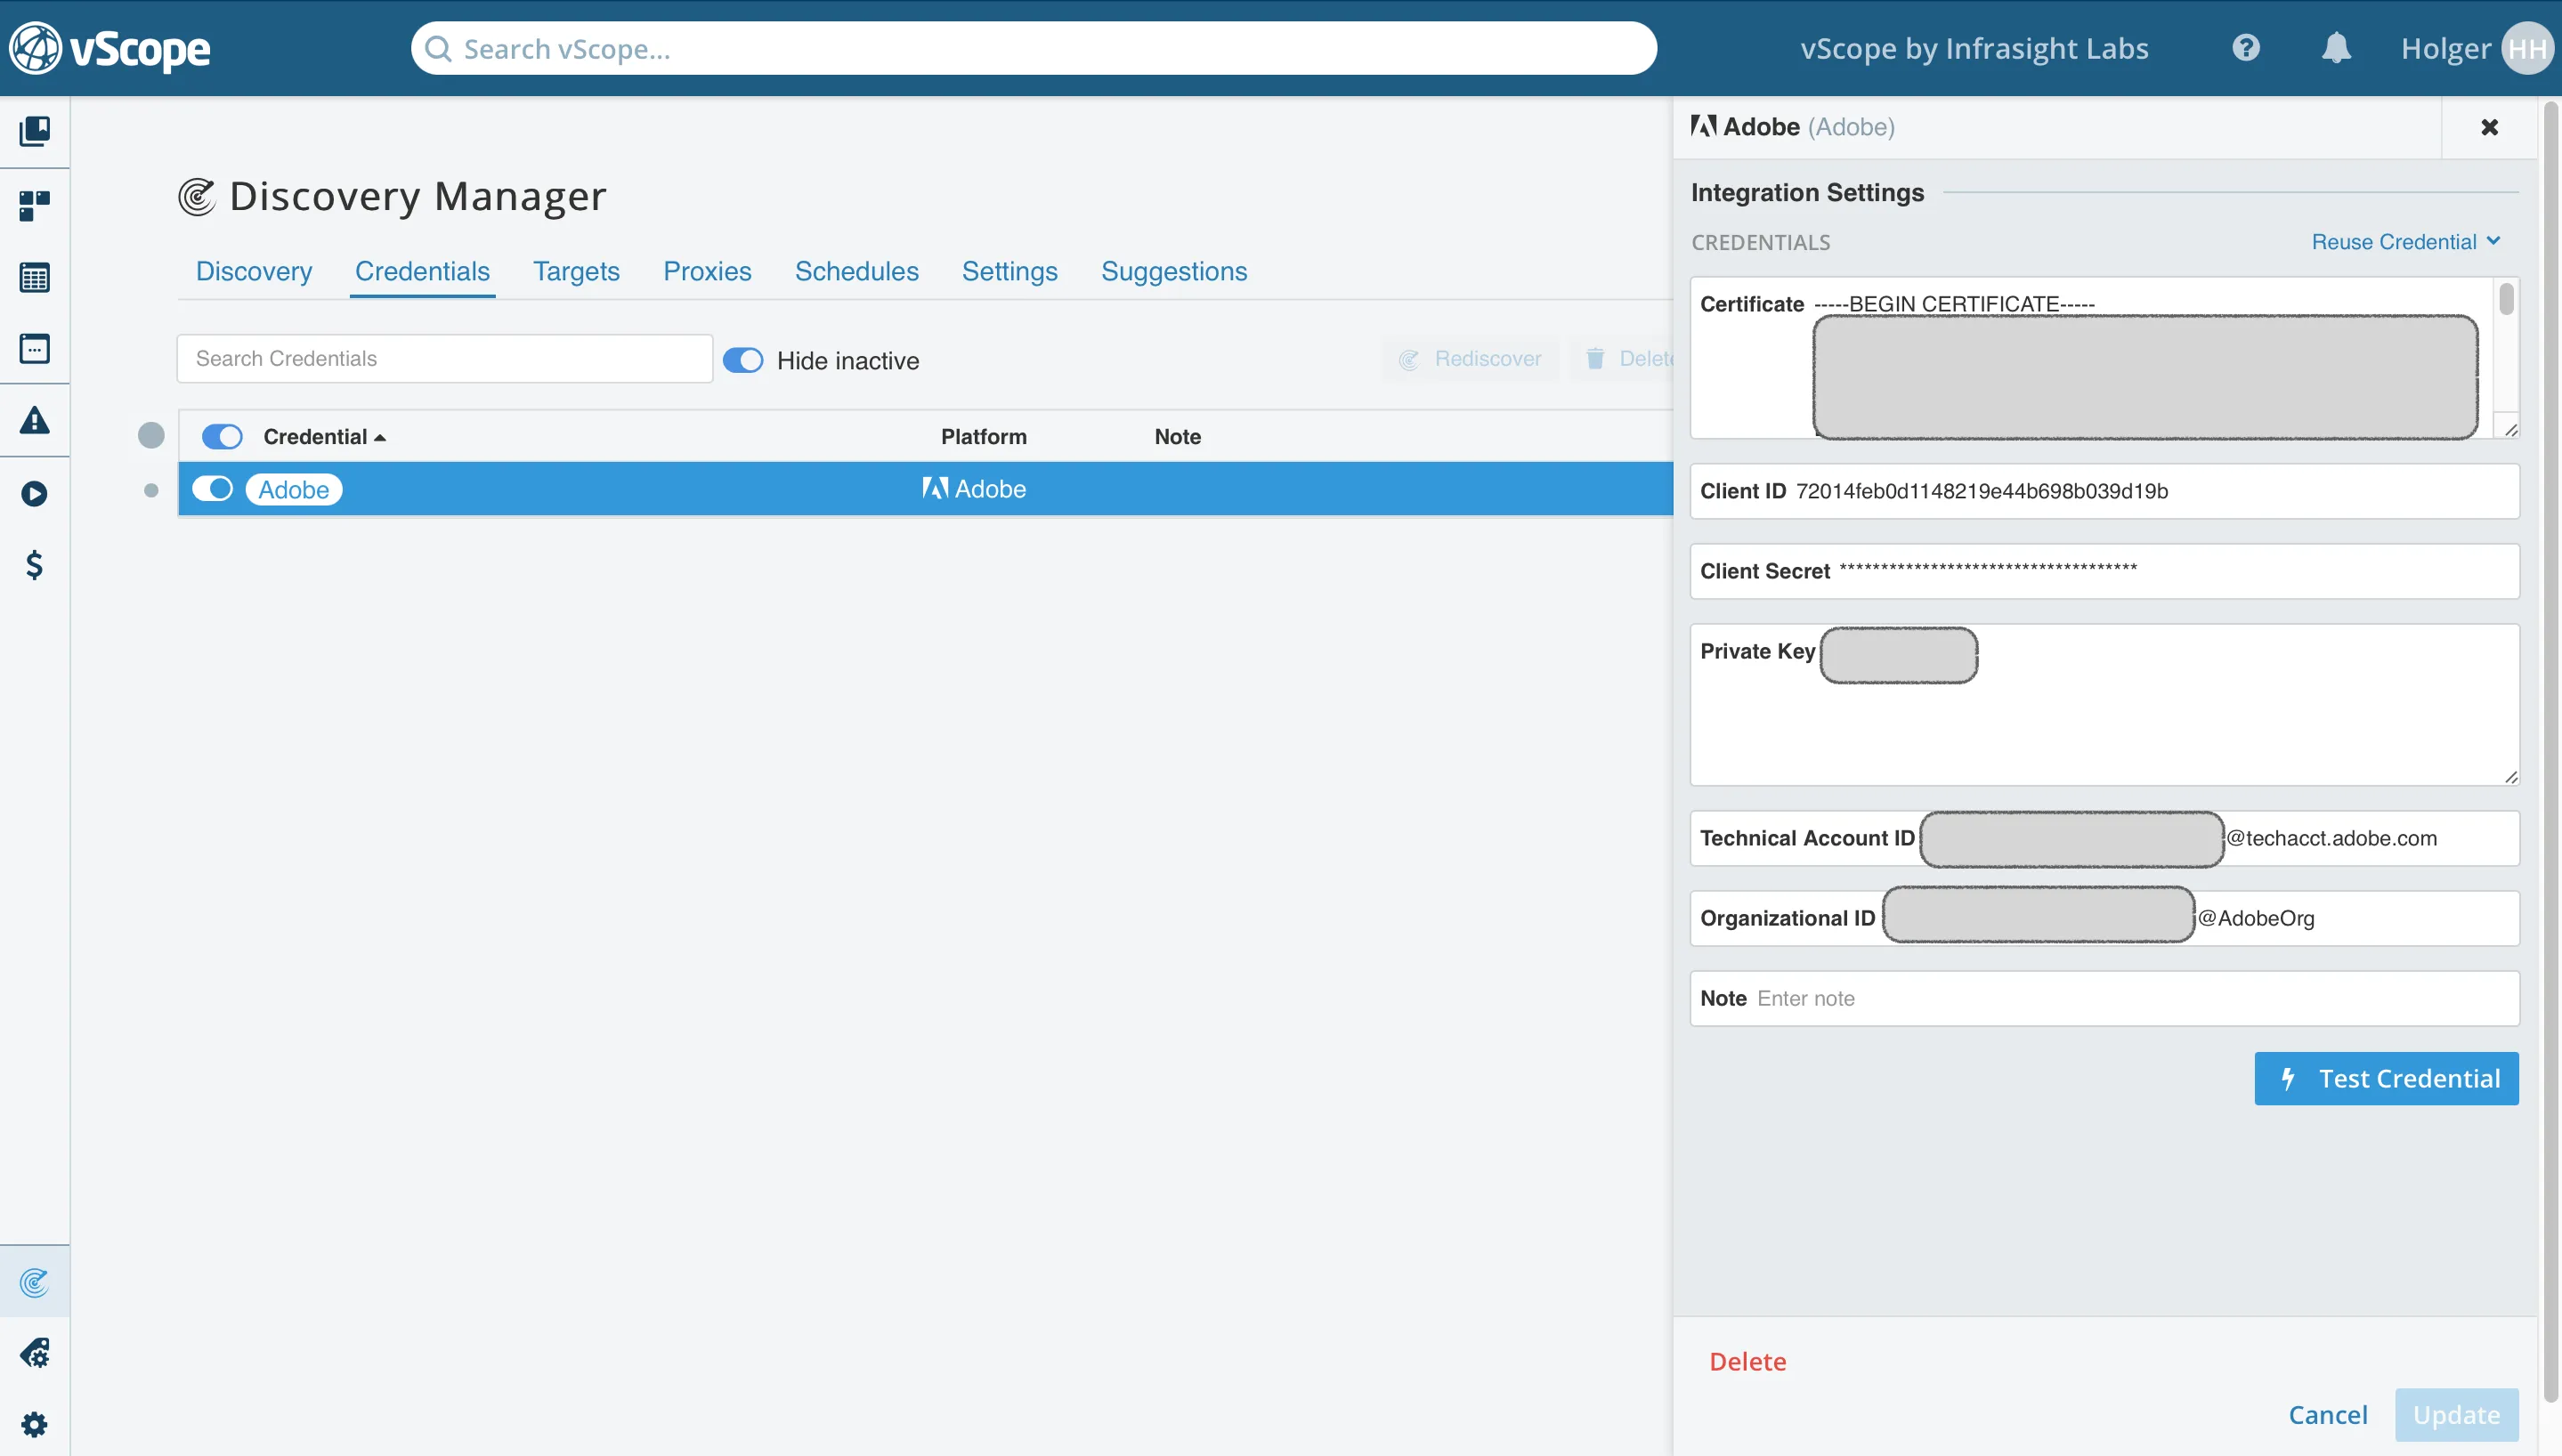
Your setup should look similar to this:
Testing and Finalizing the Connection
Section titled “Testing and Finalizing the Connection”-
Click Test Credential. If successful, a green light will indicate a valid configuration.
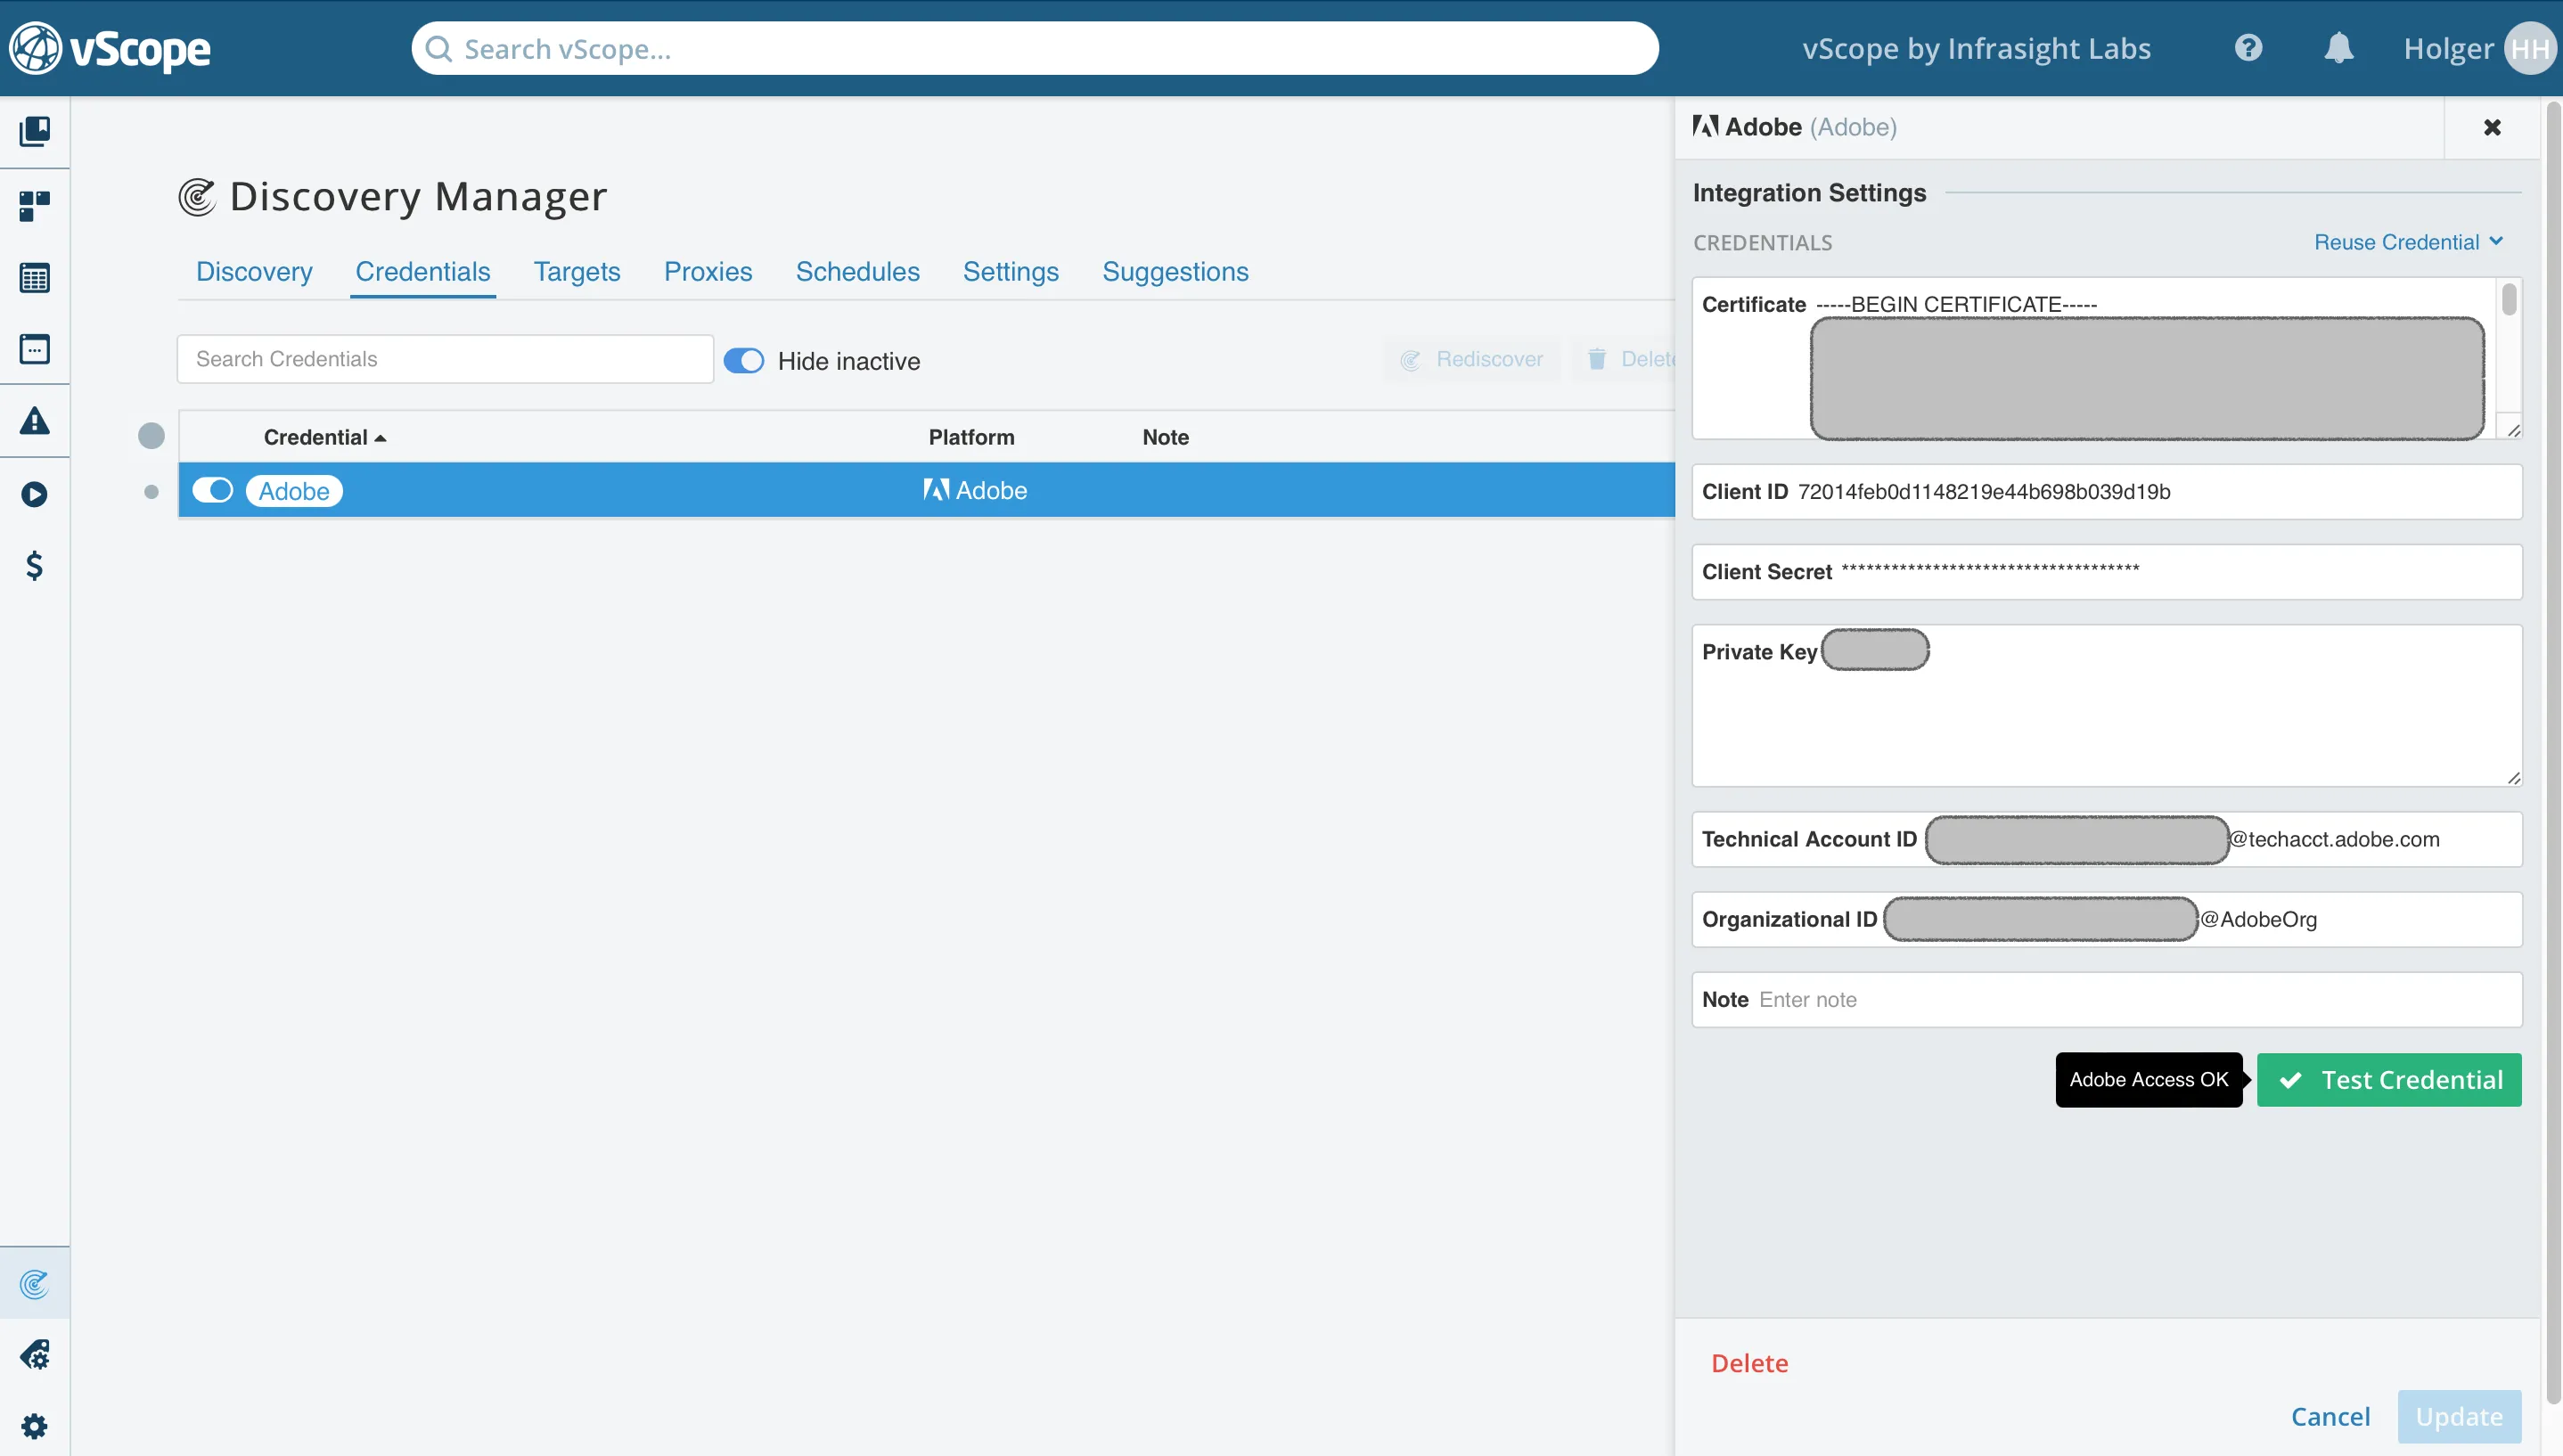
- If it’s not green, review the error message for guidance. Common issues usually involve incorrectly entered credentials.
-
Once successful, run a Discovery in vScope to populate it with new Adobe assets.