Proxies are used for discoveries in network zones where the main vScope might not have full access to all relevant ports, such as a DMZ, a customer network, or another closed network. vScope proxies communicate with the main vScope over one single port.
You can use as many proxies as you wish.
1. Prepare a server (in the closed network zone) where the discovery proxy shall run
1.1 Dedicate a server in the network zone where the discovery proxy is intended to run
1.2 You can run the vScope Discovery proxy on a dedicated server or locate the proxy on an already existing server located in the intended zone
Requirements
- Windows OS*
- 6 GB RAM (Dedicate 4GB to vScope)
- 10 GB HDD
- No additional database is required.
- 2 CPU Cores
*vScope can run on Linux OS too, but the Linux version only supports the discovery of Windows systems through Win-RM (not WMI)
2. Install the proxy
2.1 Download the proxy installer package on the intended discovery proxy server:
2.2 Download for Windows OS (for Linux, please follow this guide)
2.3 Run the installer
2.4 Point the Host address (either an IP address or a DNS-resolvable address) towards the master vScope.
2.5 Specify a communication port between the proxy and the master. The default port is TCP 4445, but you can select any port of your choice.
2.6 Finish the installer and let the proxy start.
2.7 The proxy will now identify itself with the master automatically (it might take a few minutes).
Important notice
Any discovery setting such as dynamic threading or RAM setting on the master vScope is not automatically distributed to the proxy installation. These settings are configured on the proxy in the same way as on the master vScope:
3. Locate the proxy in the Discovery Manager
3.1 Open vScope and log in
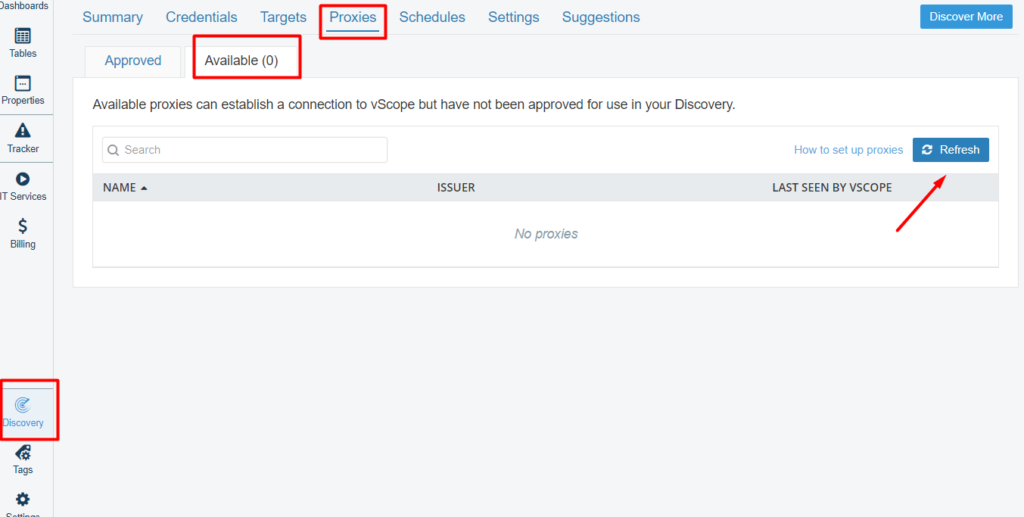
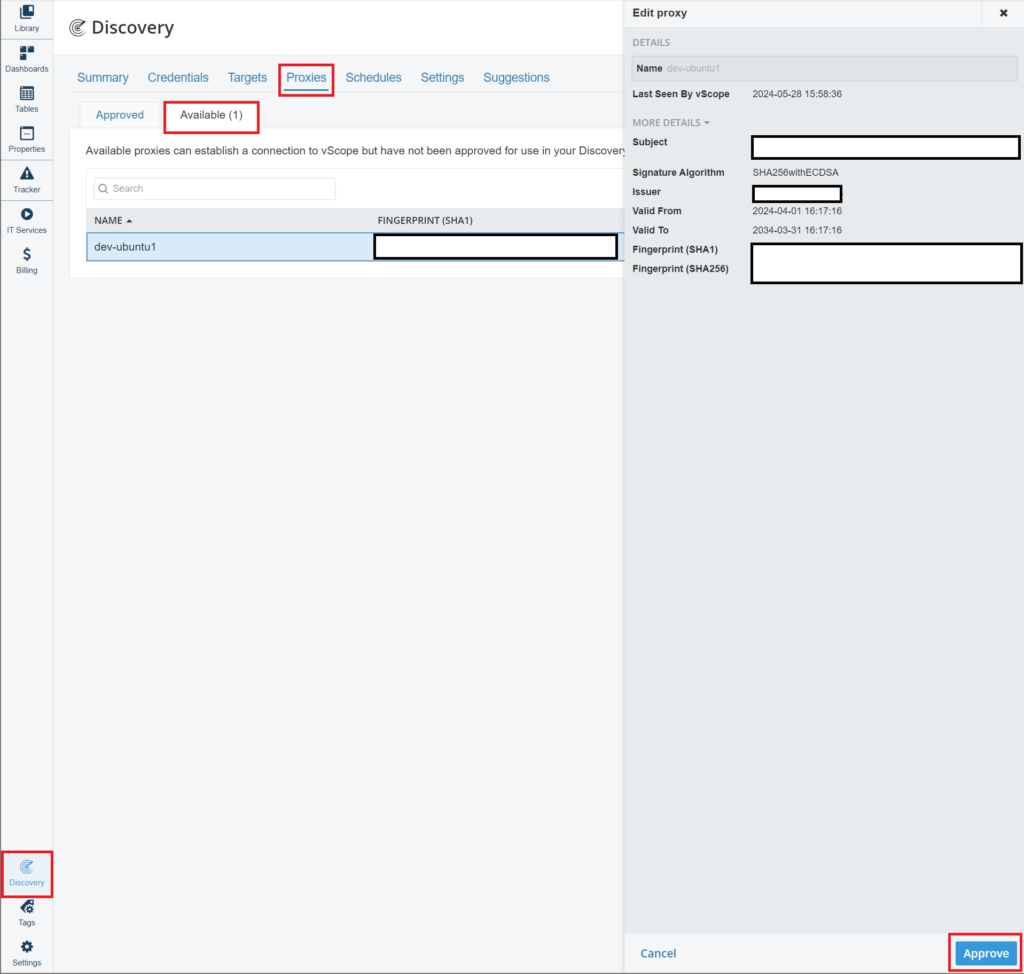
3.2 Go to Discovery->Proxies->Available. Click Refresh if the proxy has not yet been identified.
3.3 Click on the proxy and approve it.
3.4 Go to to the Approved tab and click Refresh to connect the proxy. If you wish to rename the proxy, go to the edit mode by clicking on it. There you can also assign the proxy* to a target or a target range before clicking Save.
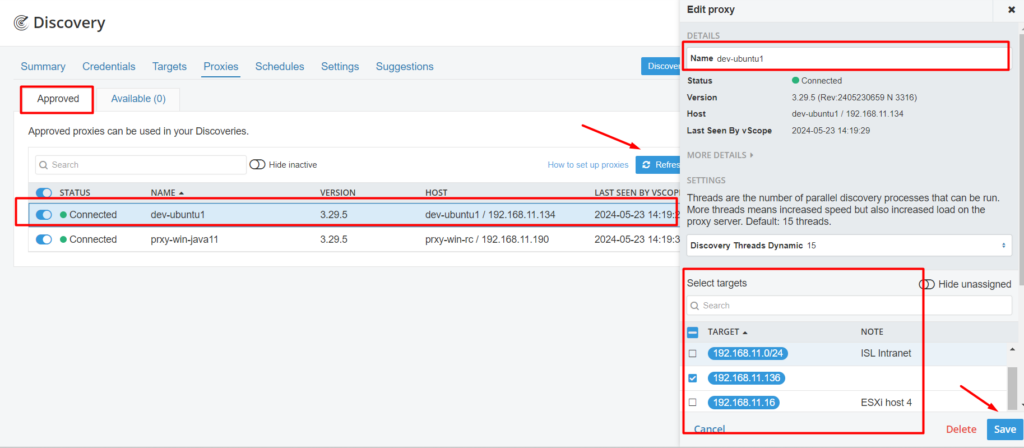
*The proxy can also be assigned either under the Target or Credential Tab.
3.5 If you no longer want to use the proxy, you may untoggle or delete it. Note that if you still have the proxy installation, it will reappear under the Available tab upon deleting.
Note – Proxy does not show up in vScope
Ensure that ports are not blocked on either side (eg. Windows Defender).