⚠️ Uploading certificates to vScope is no longer supported by Internet Explorer due to EOL.
Important before you start:
- Supported types: .keystore .p12, .pkcs12, and .pfx. We recommend the .pfx format. Check out how to export this type here:
https://support.globalsign.com/ssl/ssl-certificates-installation/import-and-export-certificate-microsoft-windows - Ensure the inbound firewall rules have the HTTPS port enabled on the vScope server. Default port is 443.
- The “Key password” and “Keystore password” can be the same in some cases.
- If you don’t have an HTTPS certificate you can read more about how to generate one here:
https://support.vscope.net/how-to-setup-https-on-vscope-web-server/
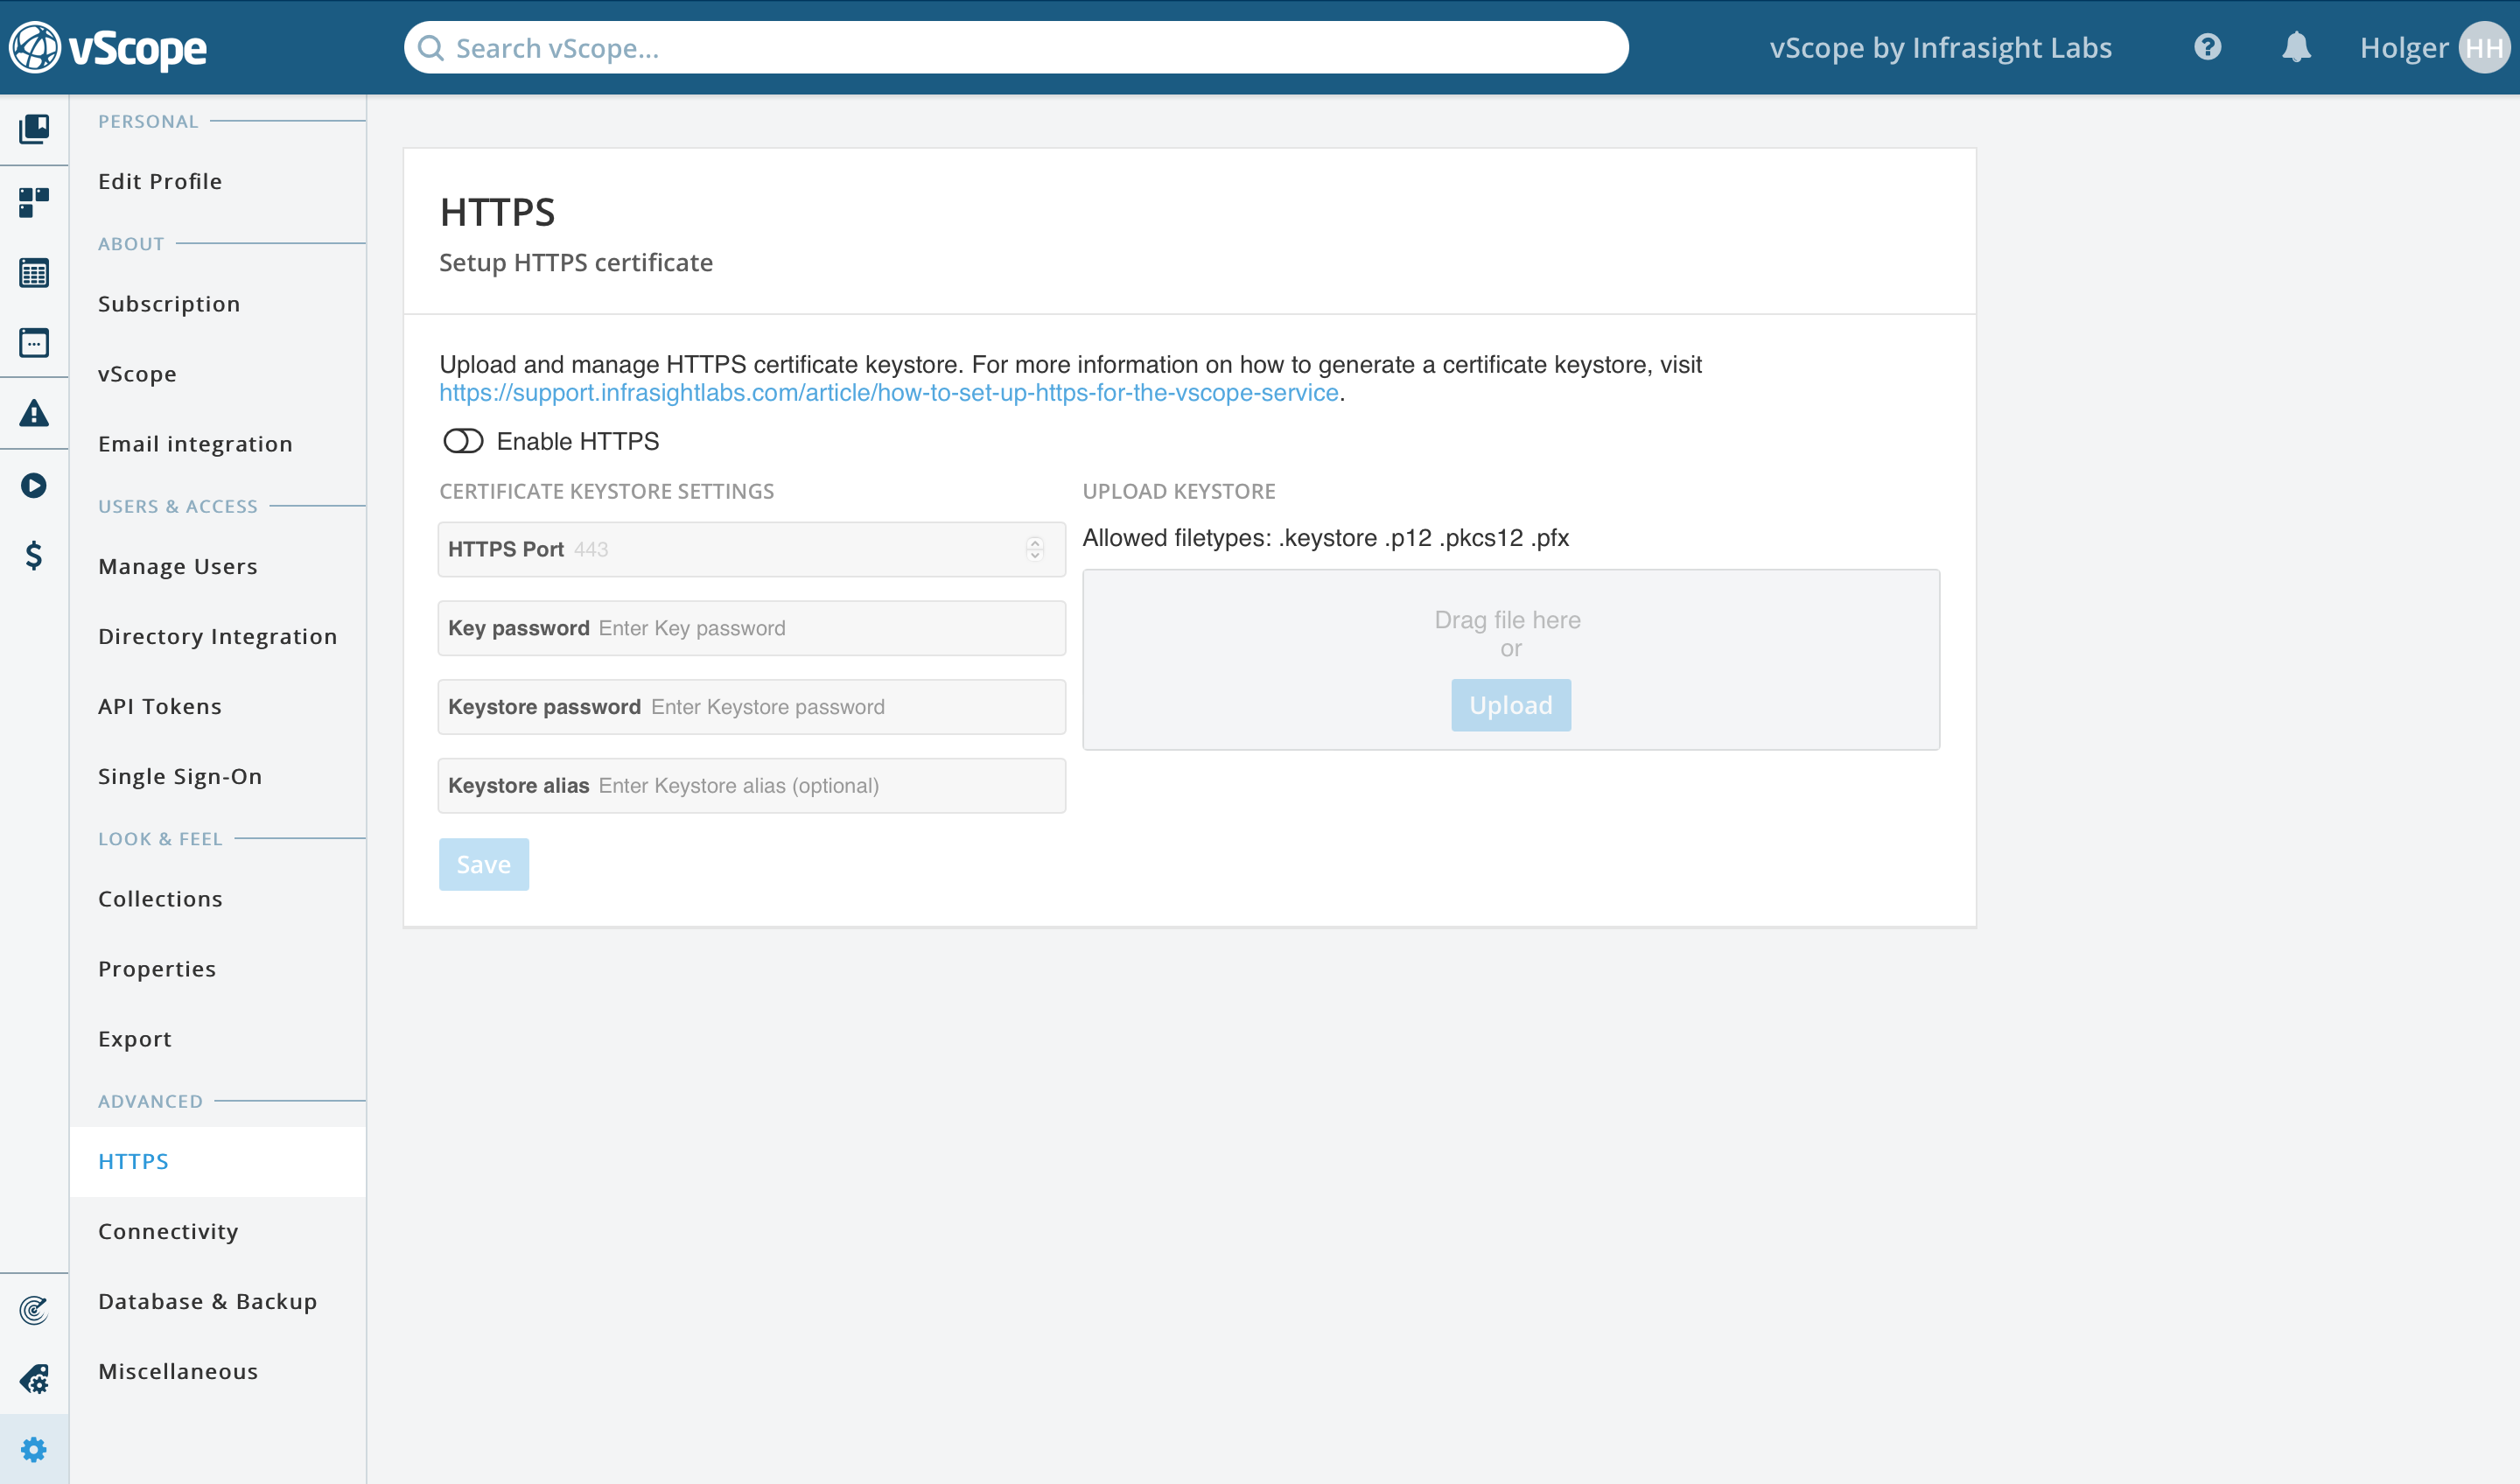
You can set up the HTTPS certificate from Settings > Advanced > HTTPS. Simply follow the steps below:
- Enable HTTPS
- Upload your keystore.
- Provide the required information. Depending on the certificate keystore settings, the required fields may vary. In some cases, Key password and Keystore password have the same value.
- Click Save.
- If there is something wrong with the settings, an error description is shown next to the Save button. Resolve the errors and click Save again.
- If the upload was successful click “Reload webservice” at the top.

Any accesses via http://vscope will be redirected to https://vscope. If not:
- Make sure 443 on the vScope server is not blocked by a firewall!
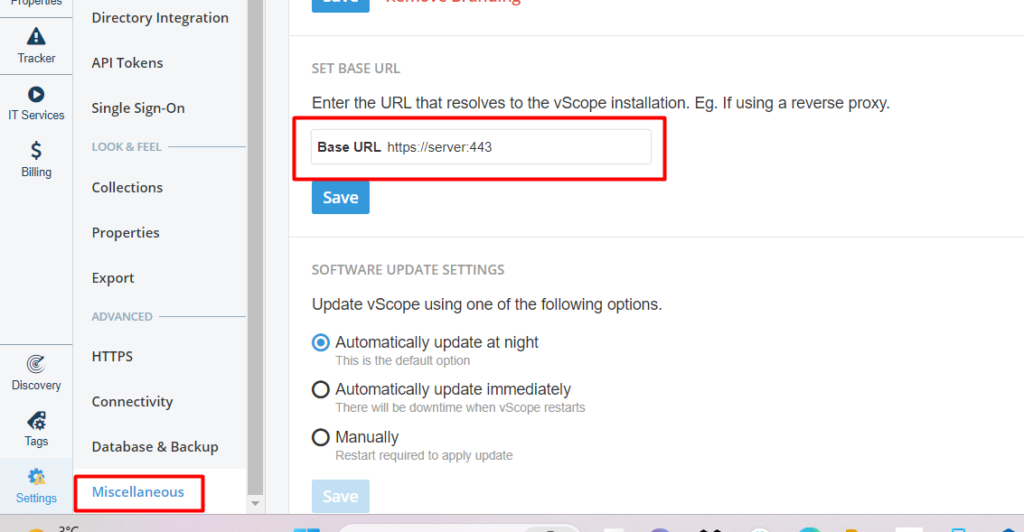
- Change from HTTP to HTTPS (and from port 80 to 443) in Miscellaneous->Base URL.

Reverse Proxy
If vScope is behind a reverse proxy and is accessed via i.e. http://vscope.company.com which forwards traffic to vScope, the certificate should only be enabled in the reverse proxy and not in vScope.
We do not recommend both https in the reverse proxy and vScope at the same time and that setup is beyond the scope of this guide.
Need help?
Our support team is always happy to be of assistance! Get in touch with them at support@infrasightlabs.com.