vScope can use the WMI protocol to inventory Windows OS machines. This also includes Hyper-V machines and the VMM.
- In this guide we’re giving WMI access to a domain user, but the steps could technically be done for a domain group and then adding the domain user to that group.
1. Create user in Active Directory
Create a user called eg. “svc_vscope” in your Active Directory.
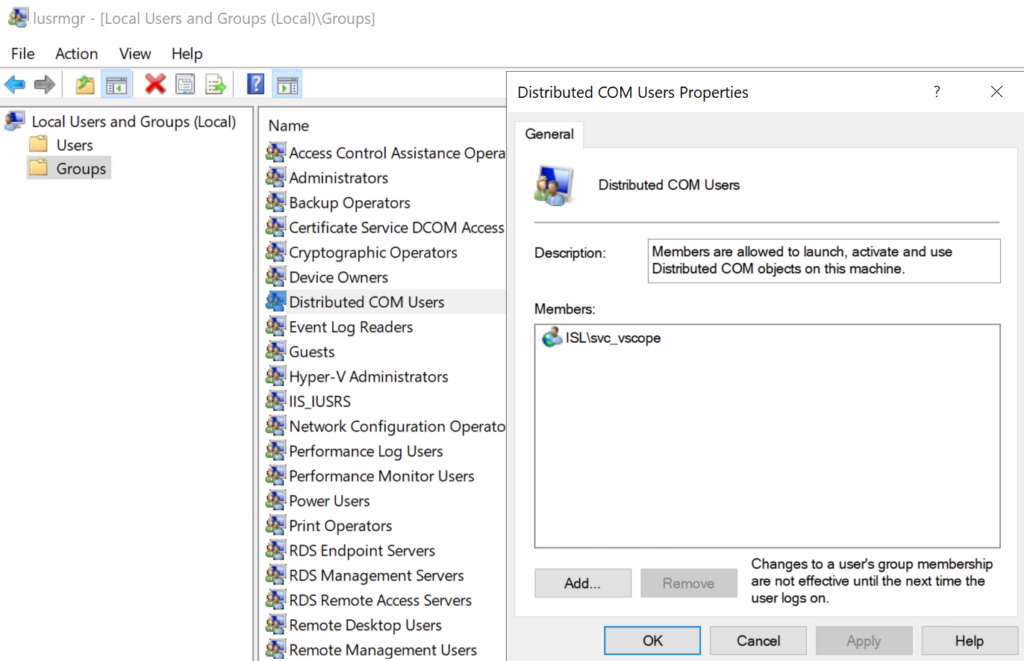
2. Add the user to the local default group Distributed COM Users
2.1 Open lusrmgr.msc.
2.2 Go to Groups.
2.3 Open “Distributed COM Users” and add the user “svc_vscope”. Click apply.
3. Setting WMI permissions
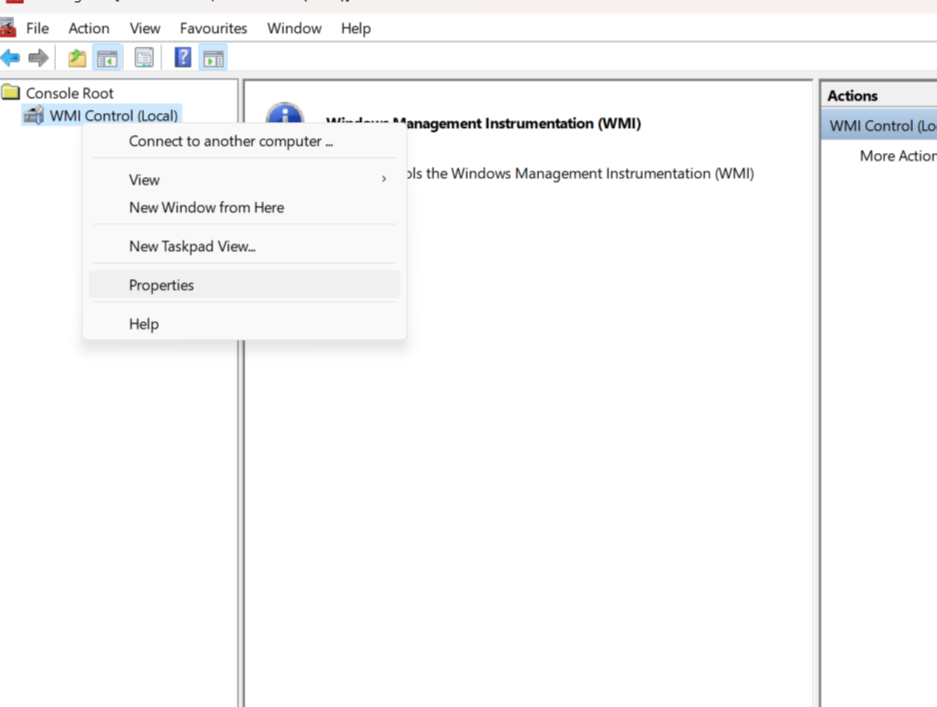
3.1 Write “wmimgmt.msc” in the command prompt
3.2 Right click on “WMI Control” and select properties
3.3 Go to the “Security”-tab, mark “Root” in the tree structure and click on “Security”.
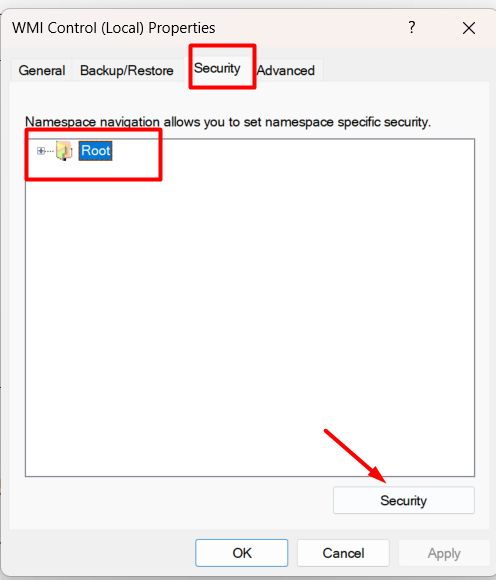
3.4 Select “Advanced”.
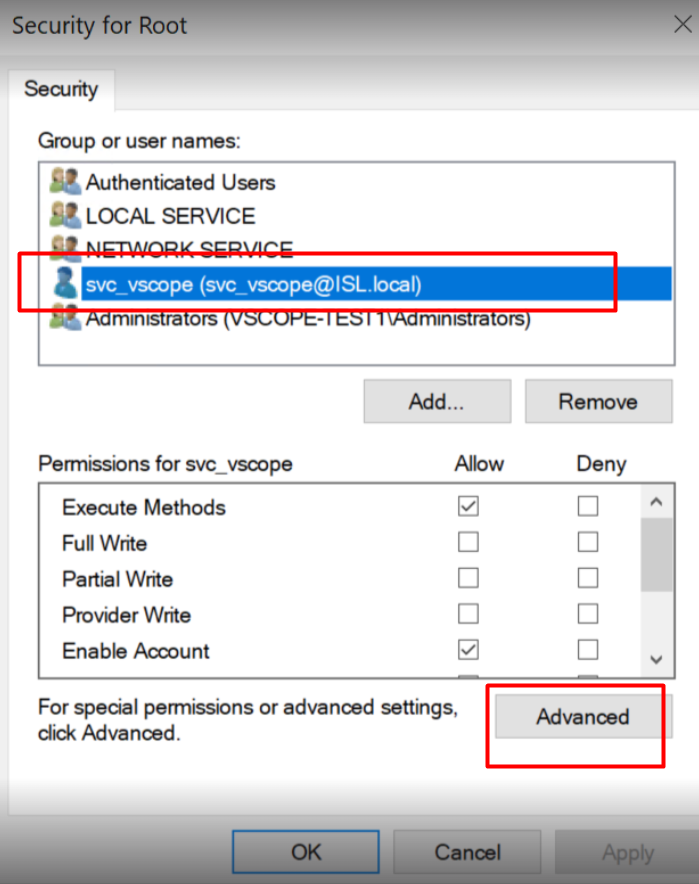
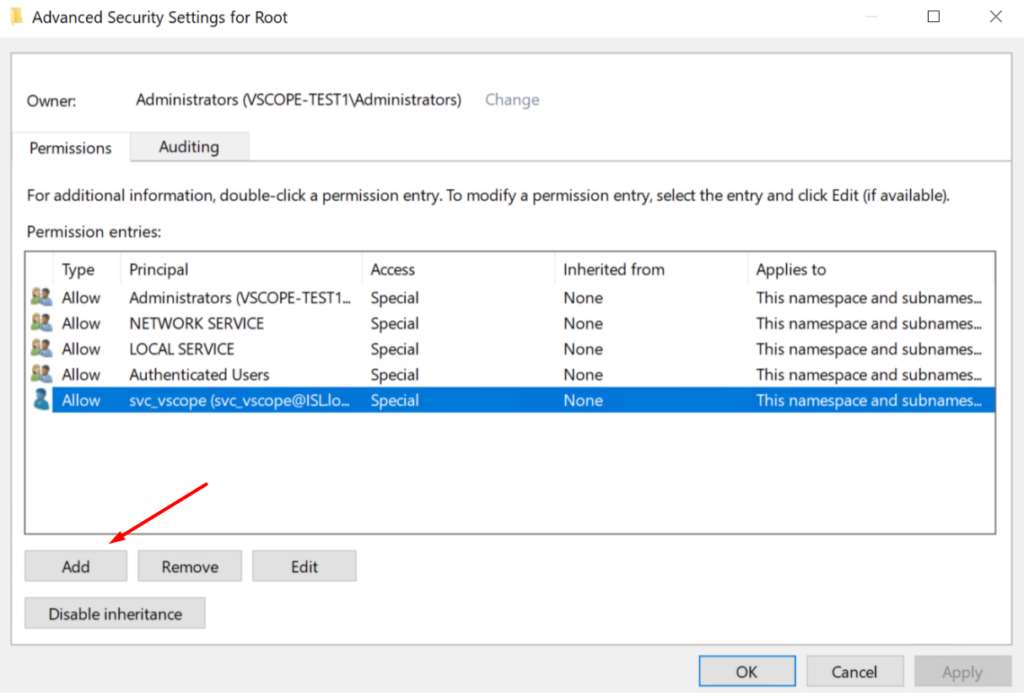
3.5 Click “Add”.
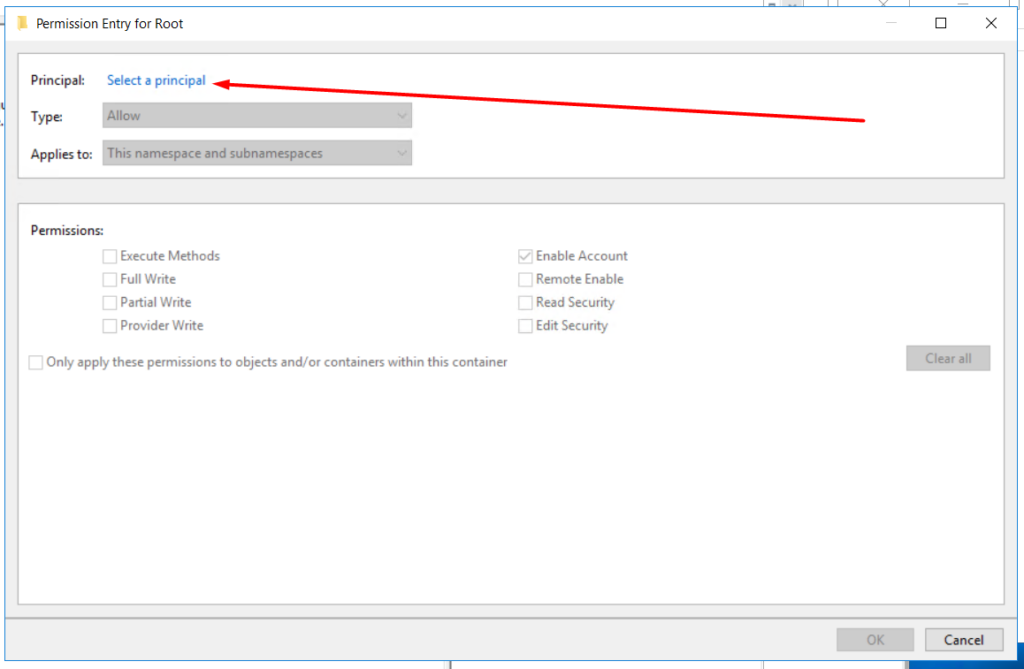
3.6 Click “Select a principal”.
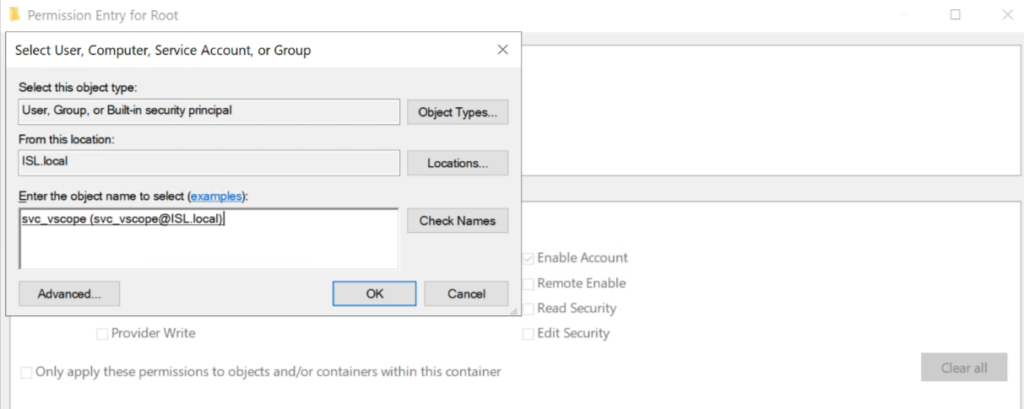
3.7 Enter the user name and click “OK”.
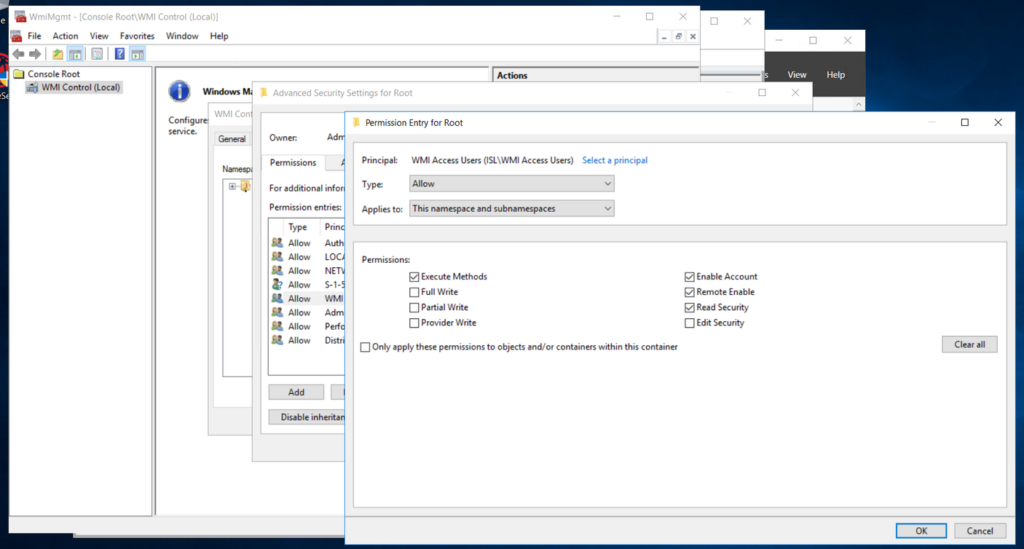
3.8 Under “Applies to:”, ensure it’s set to “This namespace and subnamespaces”, then check boxes for Execute Methods, Enable Account, Remote Enable and Read Security. Then, click “OK”.
3.9 Click “Apply”, and “OK” to close and save settings in all windows.
4. DCOM-permissions
4.1 Open “dcomcnfg”.
4.2 Expand ‘Component Services’ –> ‘Computers’, and right-click on ‘My Computer’ and select ‘Properties’
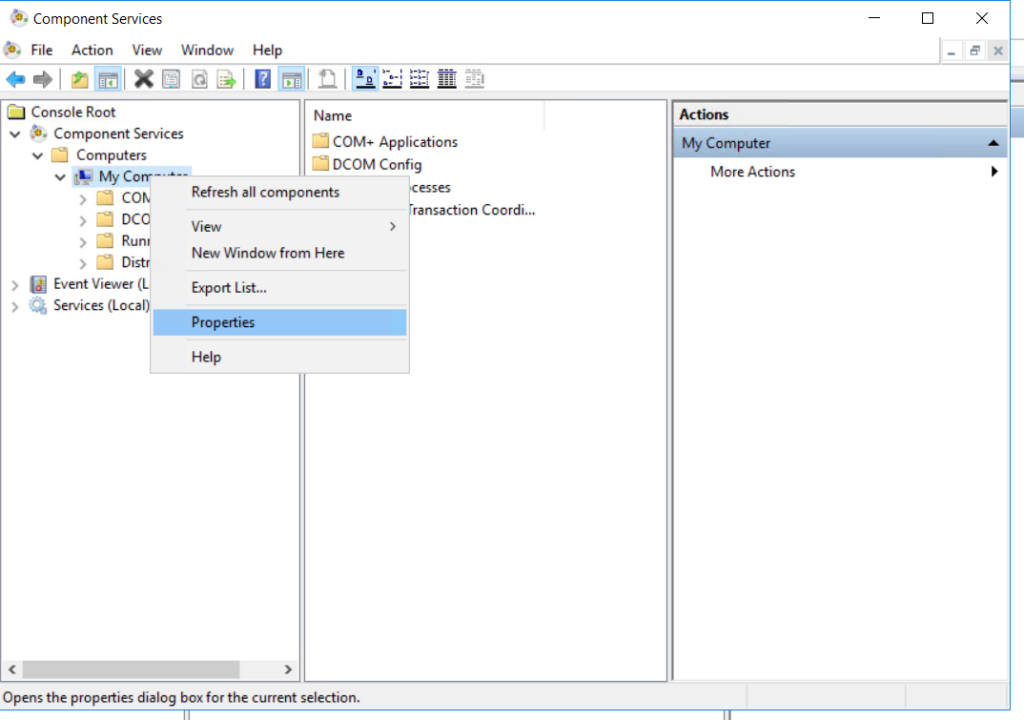
4.3 Select the “COM Security” tab and click “Edit Default…” for both “Access Permissions” and “Launch and Activation Permissions”.
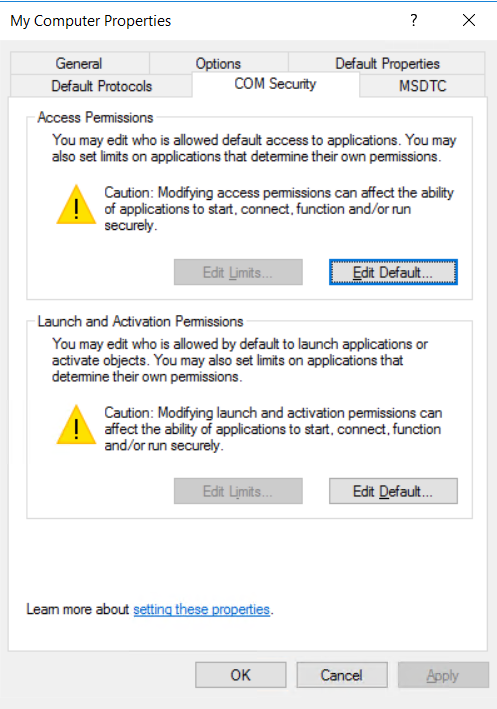
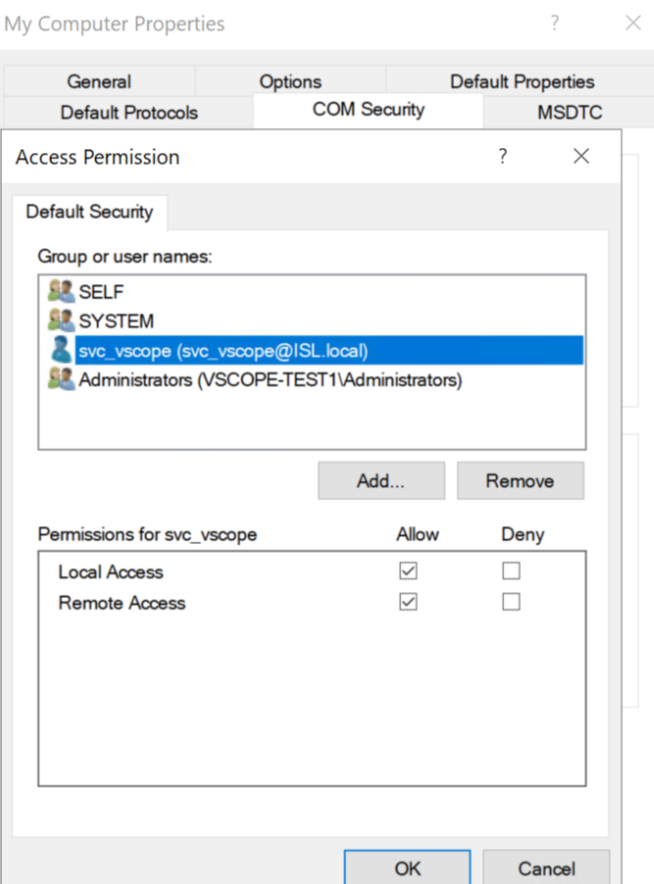
4.4 Access Permissions. Add “svc_vscope” and allow all permissions in the boxes below. Click OK.
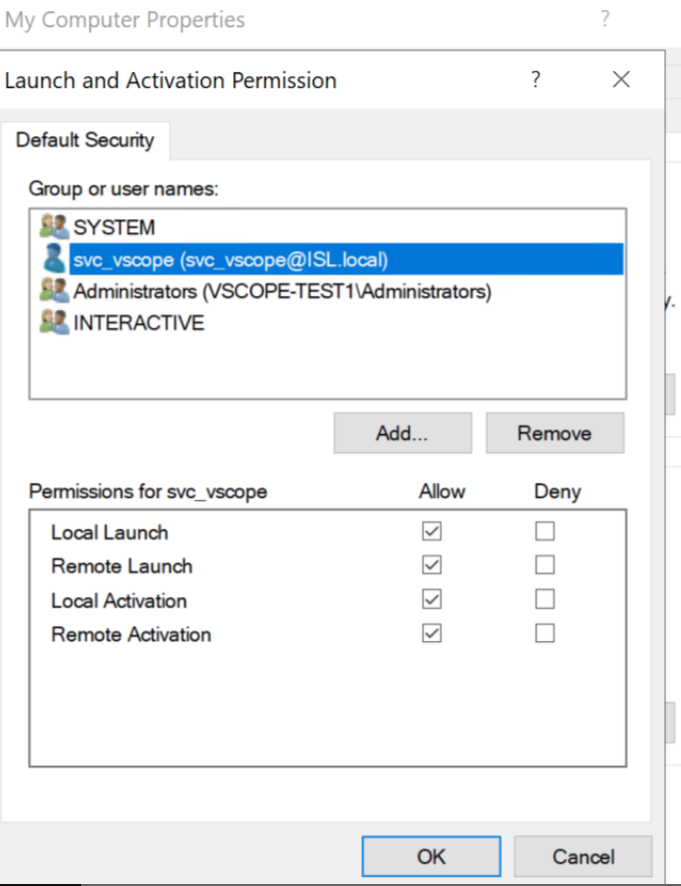
4.5 Launch and Activation Permission. Add “svc_vscope” and allow all permissions in the boxes below. Click OK.
4.6 Click “Apply” and OK in all windows to close and save settings.
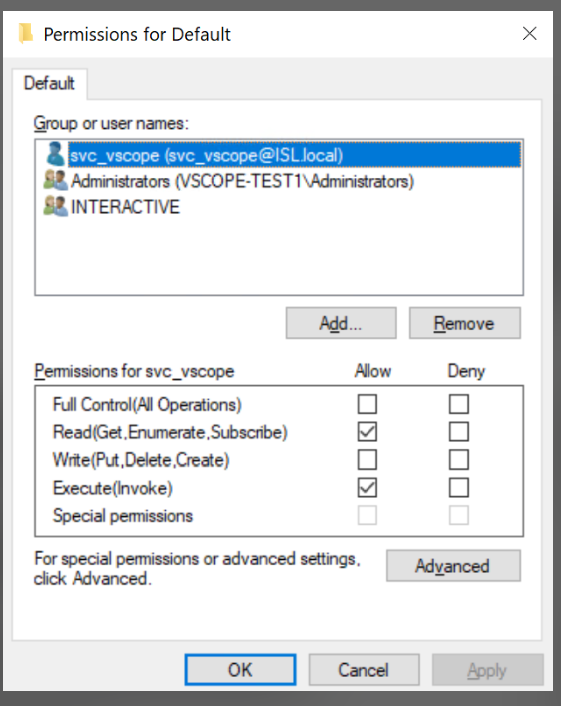
5. Enable WinRM
5.1 To enable WinRM, you need to go to Permissions for Default. Enter the following command in the command prompt:
winrm configSDDL default5.2 Add the user to the list by clicking “Add”.
5.3 Select the user, then check the Read(Get,Enumerate,Subscribe) and Exexcute(Invoke) and click “OK”.
And that’s it. The domain user will now have remote WMI/WinRM access to the machine.
Optional
If WMI doesn’t work after the previous permission setup it may be because of local settings on the machine. Below are common configurations that may be needed.
Open firewalls for WMI traffic
Enter the following in the command prompt: “netsh advfirewall firewall set rule group=”windows management instrumentation (wmi)” new enable=yes”
Turn off UAC
If UAC is not turned off, vScope might have trouble accessing some information.
1. Access “regedit”.
2. Change the following key from 0 to 1:
HKEY_LOCAL_MACHINESOFTWAREMicrosoftWindowsCurrentVersionPoliciessystemLocalAccountTokenFilterPolicy3. Close regedit
0 = Remote UAC access token filtering is enabled.
1 = Remote UAC is disabled.
Read more at: https://docs.microsoft.com/en-us/troubleshoot/windows-server/windows-security/user-account-control-and-remote-restriction
Enable RPC permissions on a single target machine:
- Run Microsoft Management Console on the target machine (Start|Run|mmc)
- Add “Group Policy Object Editor” snap-in (File|Add/Remove Snap-in…|Add…|Group Policy)
- Select the “Local Computer” Group Policy Object for which you want to enable RPC
- Navigate to: [Group Policy Object]|Computer Configuration|Administrative Templates|Network|Network Connections|Windows Firewall|Domain Profile ( for a Domain administered network – Standard Profile for a Workgroup network )
- Edit Setting: “Windows Firewall: Allow Remote Administration Exception”
- Set “Enabled”.
- Set “Allow unsolicited incoming messages from:” to “localsubnet” (without the quotes)
- Apply settings
- These settings will not generally take effect immediately. You can use Microsoft’s Group Policy Update Utility to force immediate updates.
WMI troubleshooting articles
- https://support.vscope.net/troubleshooting/wmi-troubleshoot-access-denied-error/
- https://support.vscope.net/troubleshooting/verify-wmi-access-for-a-regular-non-admin-domain-user/