This guide will show you, step-by-step, how to integrate vScope with an SQL database. We will inventory Computer Systems and a tag, Total Cost, displaying the cost of each asset. This guide, however, is applicable to every asset type and any number of tags.
Learn more about the requirements for each asset type.
Video: Getting started with Custom SQL
Steps
- Ensure that vScope has access to the SQL database and that you have the required credentials to log in.
- Check the SQL table: Do all required columns exists? What columns do you want to fetch? Which assets have the required values? Which assets do you expect to be added, and which will be matched with existing assets?
- Write the SQL query and, if possible, preview the result before pasting it into vScope.
- Add the query to vScope and run discovery.
- Preview the result in vScope.
- Configure tags in Tag Manager.
1. Access & Credentials
First and foremost you need to confirm that the vScope server has access to the SQL database. Depending on the type of SQL database, vScope tries to connect on different default ports:
- MySQL: 3306
- MSSQL: 1433
You can configure vScope to connect to the database under Advanced settings when adding a credential for Custom SQL.
You also need an account with sufficient permission to read data from a database table. Learn more about
- How to create MySQL user accounts and grant privileges (Linuxize.com)
- Create a database user (Microsoft Docs)
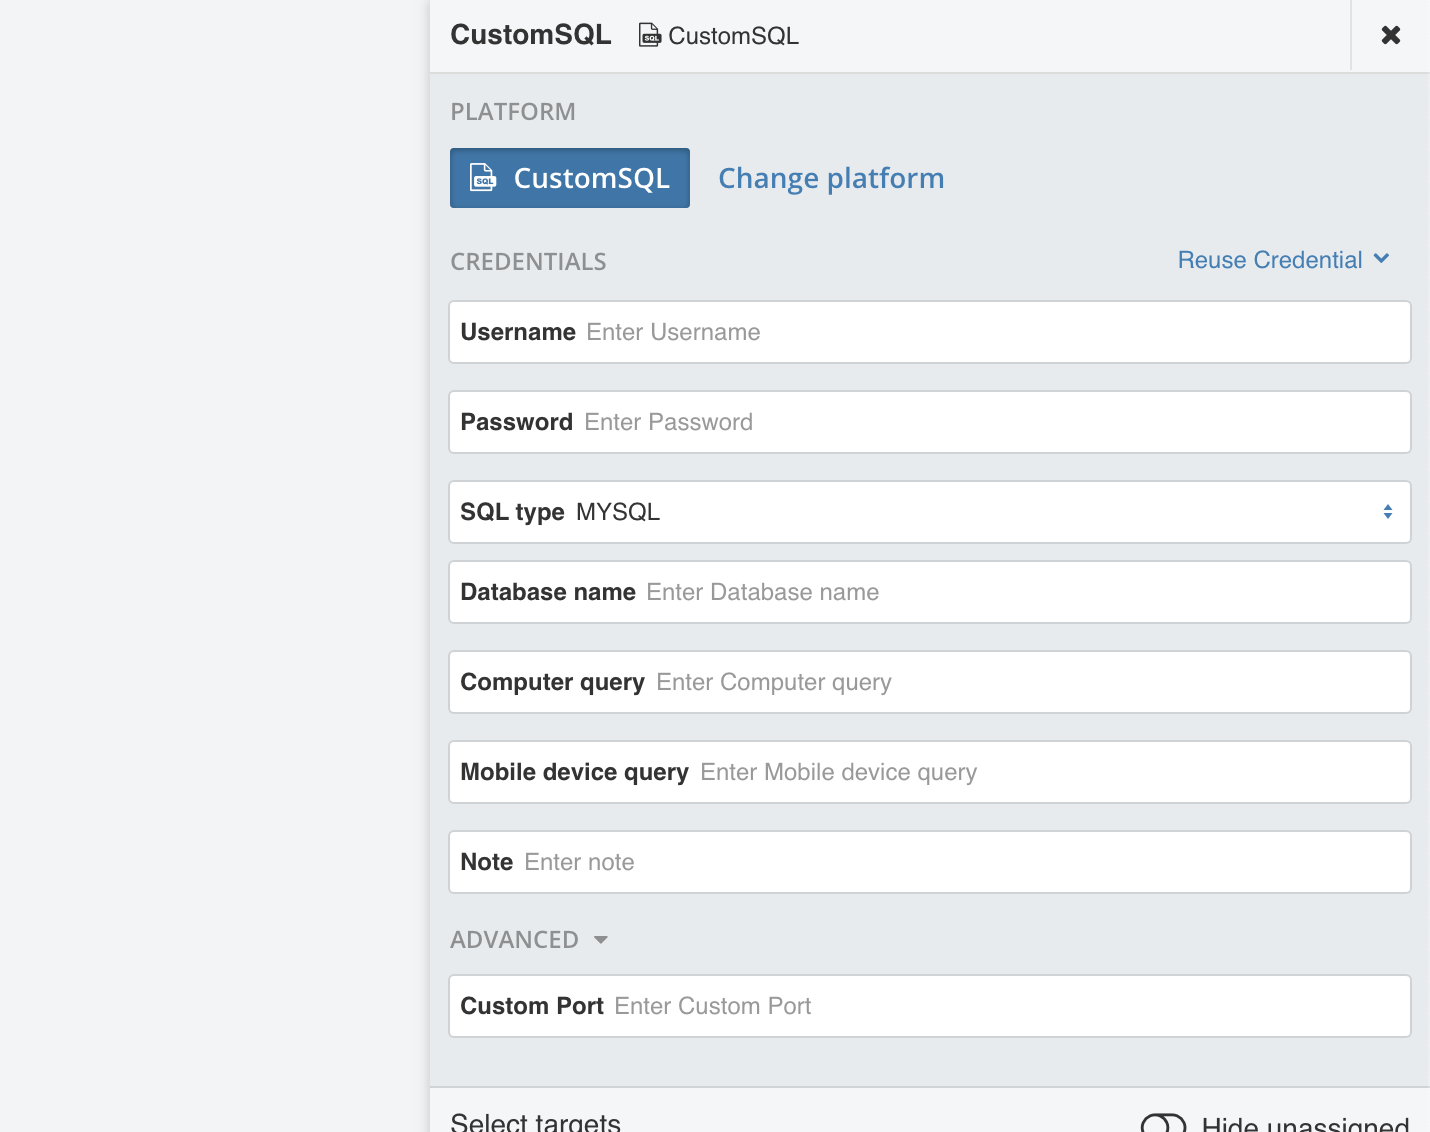
Now go to Discovery Manager Credentials + Credential Custom SQL, and input the required values:
- Username
- Password
- SQL type
- Database name
- Query (depending on what asset type you want to inventory. See below)
- Note (Optional)
- Advanced Custom Port (optional)
2. Check SQL table in data source
In this case, we are adding assets from a MySQL database. Looking at the table, I notice a few things that we need to alter in the next step, in which we will write the query vScope will use to inventory assets.

Notice that the column “Serial Number” must be renamed “Asset Serial Number” in the query to allow vScope to match the assets to existing ones in vScope.* Also, the asset “iPhone” should be excluded in the query since we only want to inventory computers.
* Read more about the required columns for each asset at How to use Custom SQL in vScope
3. Writing the SQL query
Now back to the query. We will start from a default query that selects all assets from the table, then alternating it to match our criteria:
SELECT * FROM `asset_table`
We don’t need to fetch all columns (excluding Asset Type), and we will also need to rename the Serial Number column to Asset Serial Number:
SELECT `Name`, `Domain`, `Serial Number` AS `Asset Serial Number`, `Total Cost` FROM `asset_table`
And finally, only select computers from the table:
SELECT `Name`, `Domain`, `Serial Number` AS `Asset Serial Number`, `Total Cost` FROM `asset_table` WHERE `Asset Type` = "Computer"
If possible, confirm that the query result match the expected output that you want vScope to read.

4. Inventory the SQL database
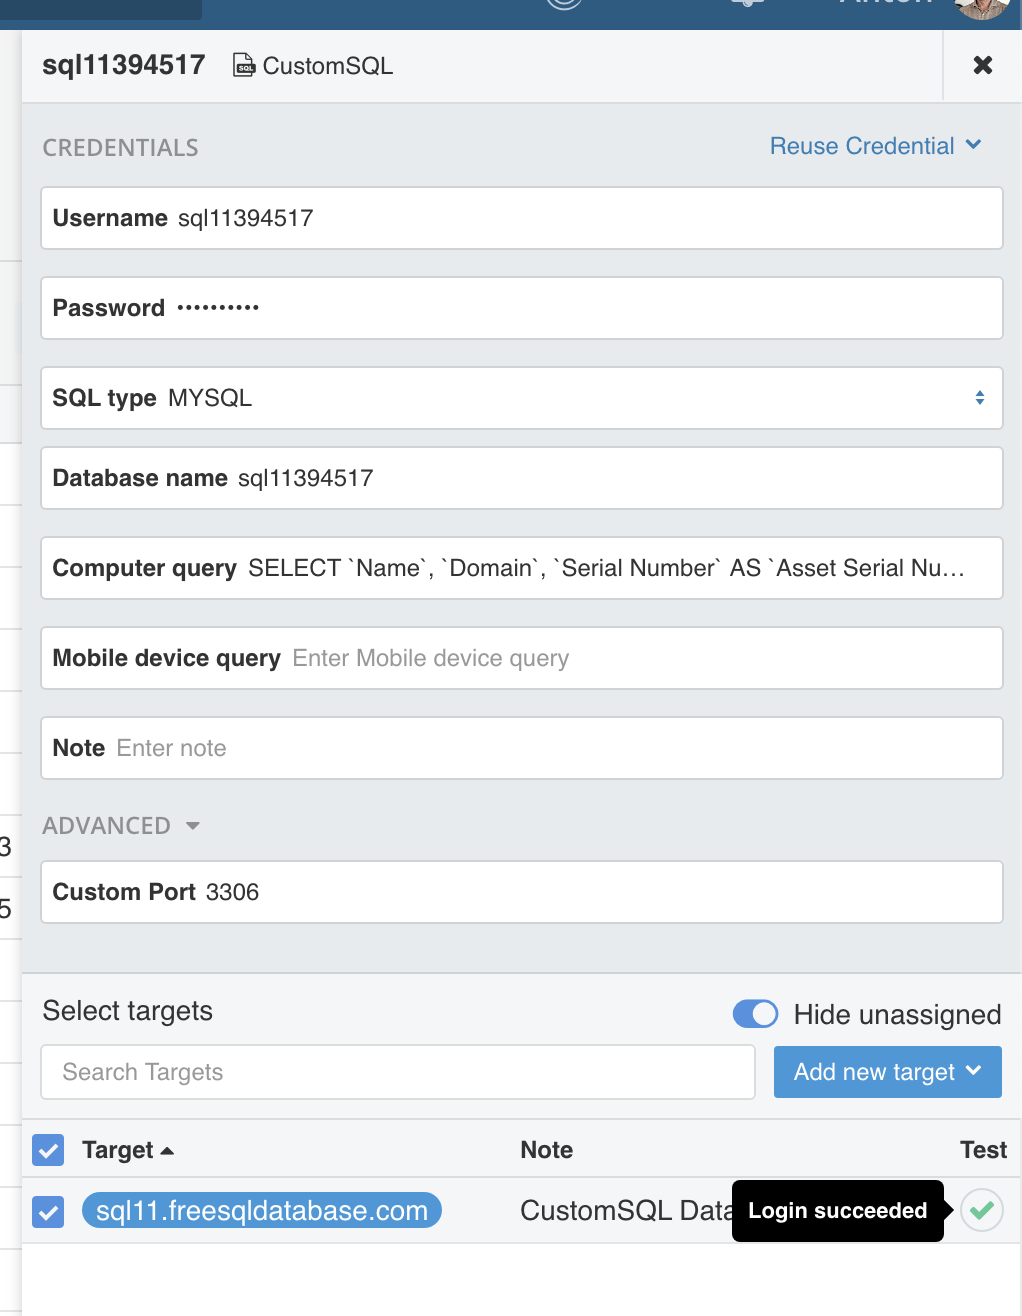
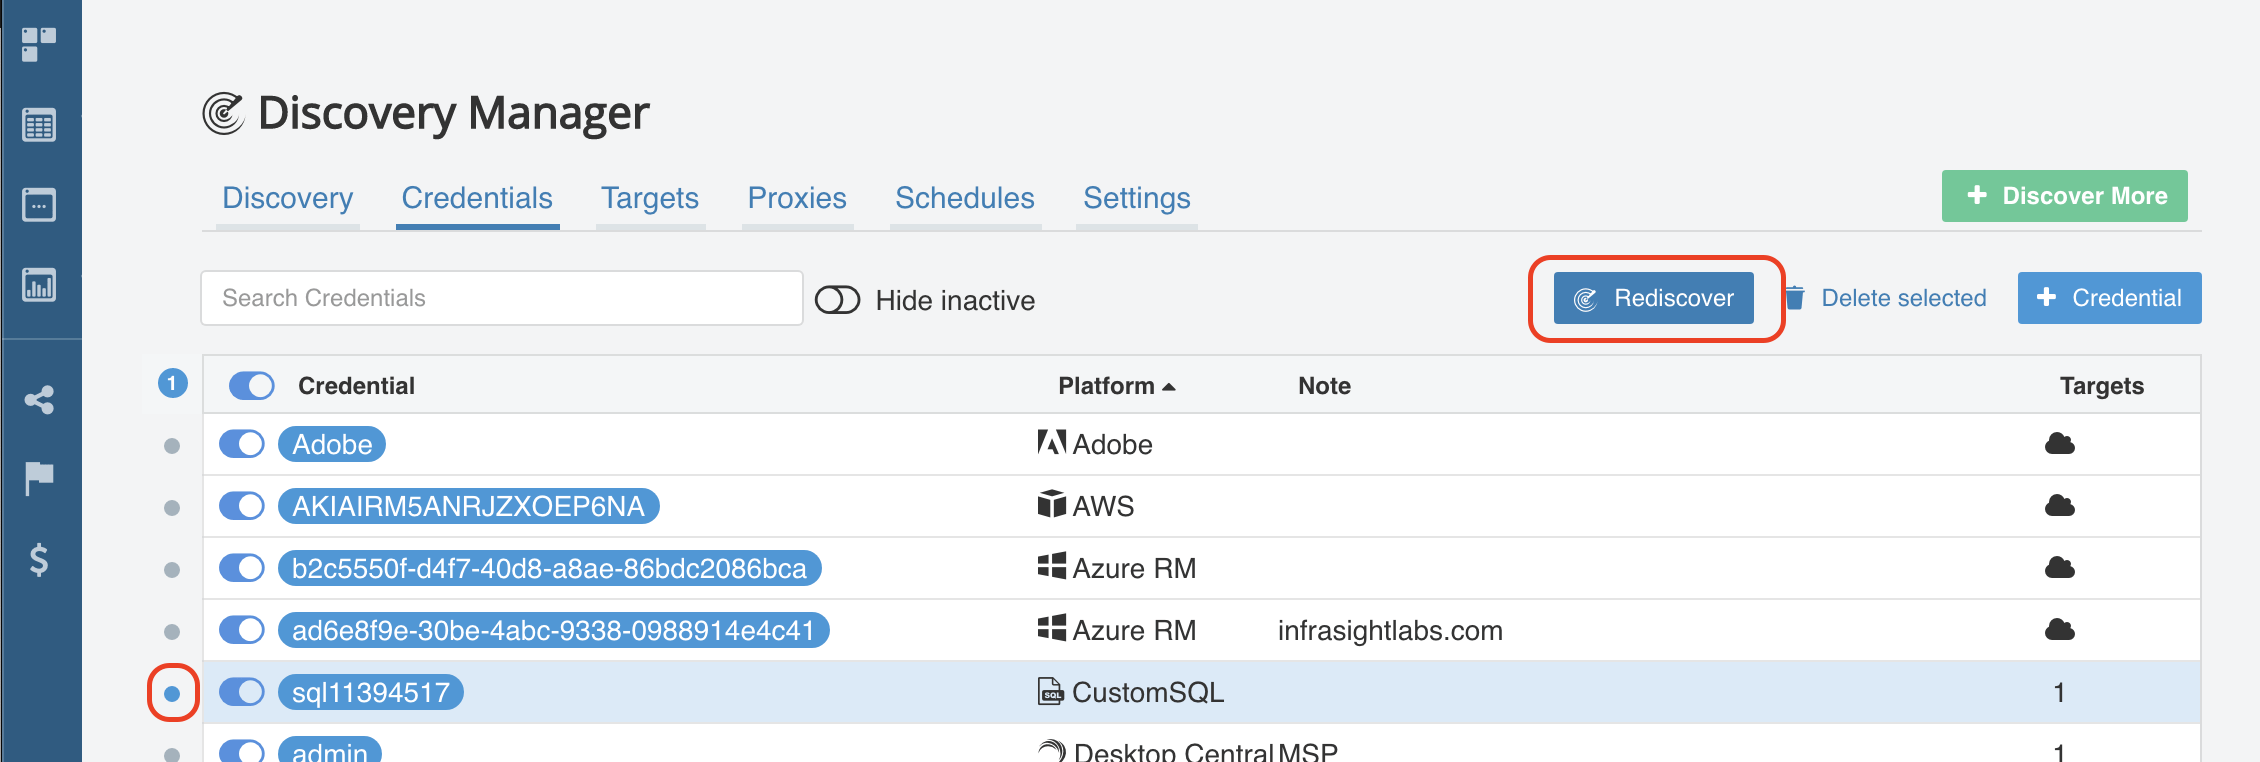
Back to vScope. Paste the query in the Computer Query input. Confirm access and format of the query by clicking the lightning. If the login was successful, you can run a “Rediscover” of the Custom SQL credential
Everything looks OK. If we want the details we can find them in the Log history tab.
5. Looking at the results
Since we are adding Computers, we will build a list in Table Explorer of All Machines, filtering on “Found By: Custom SQL“

As we can see a few new assets have popped up, some are new and one has been stitched with already existing assets in vScope.
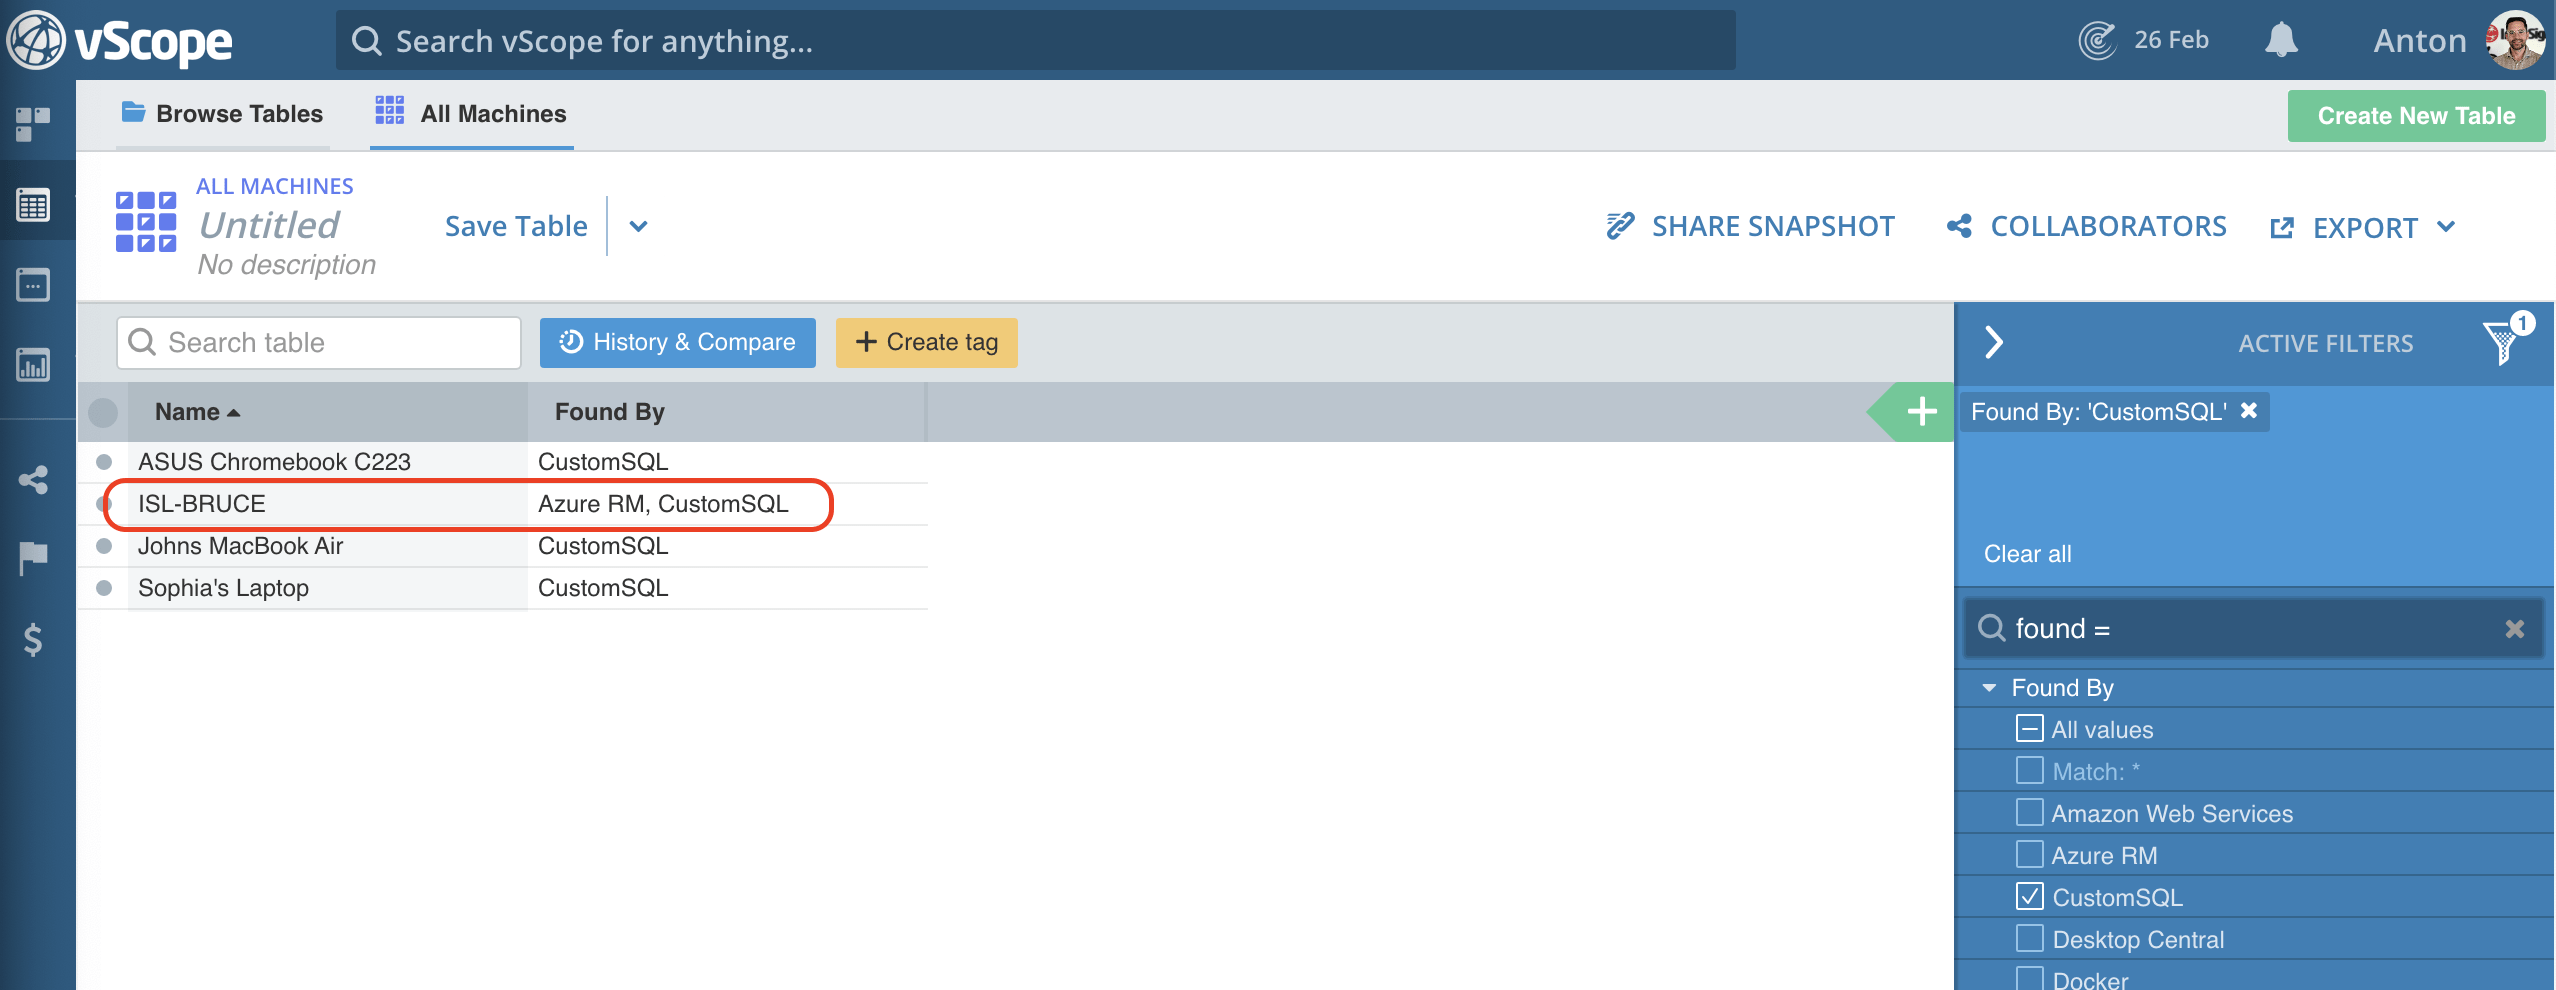
Only four out of five assets were added to vScope. This is since Tom’s MacBook Pro does not meet the requirement of having either a domain or Asset Serial Number value. Also, notice that neither ASUS Chromebook nor Johns MacBook Air has been matched.
This is because of the requirement:
- Only allowed to match on Asset Serial Number if there is ALSO a match on Name + Domain.
Hence, a name is not enough…

Remember, check the requirements and compare them with the assets in the SQL database. This will help you better understand which assets will be stitched and which will not.
6. Fetching values to a tag in vScope
Finally, the connection is established and assets will continuously be inventoried by vScope according to the configurations we have added. We can now configure vScope to also fetch values from the SQL database and add them to tags in vScope.
Go to Tag Manager Created from discovery + Create tag Custom SQL / All Machines.
We will name the new tag “Total Cost (SQL database)”, adding the SQL database to help our user to better understand that this tag fetches its values from an external SQL database.
Expanding the “Value from”-dropdown will show all values that are available from the Query we wrote in Step 3, and an example value as a preview. We select Total Cost, select Number as format, and define the Unit as SEK.
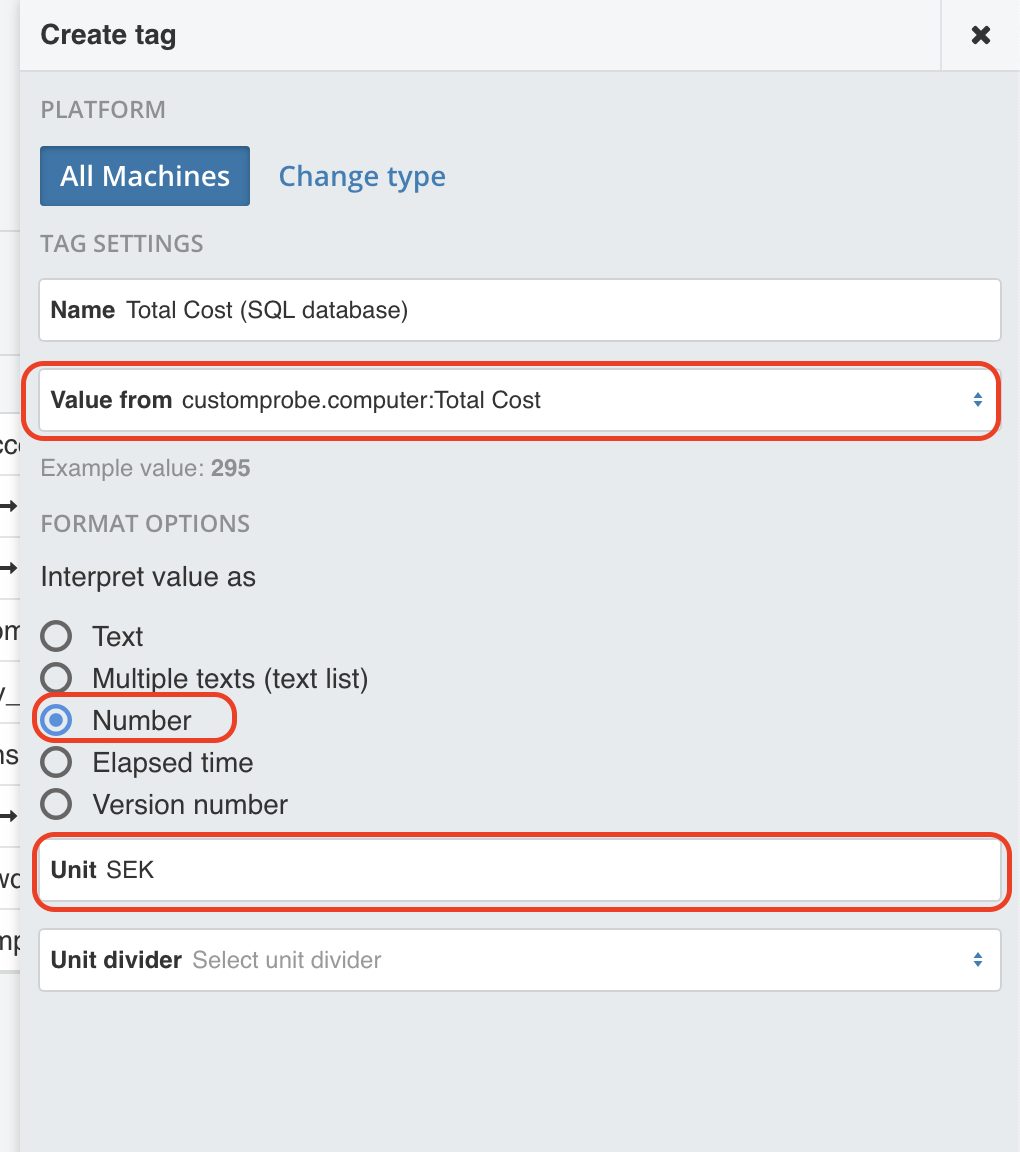
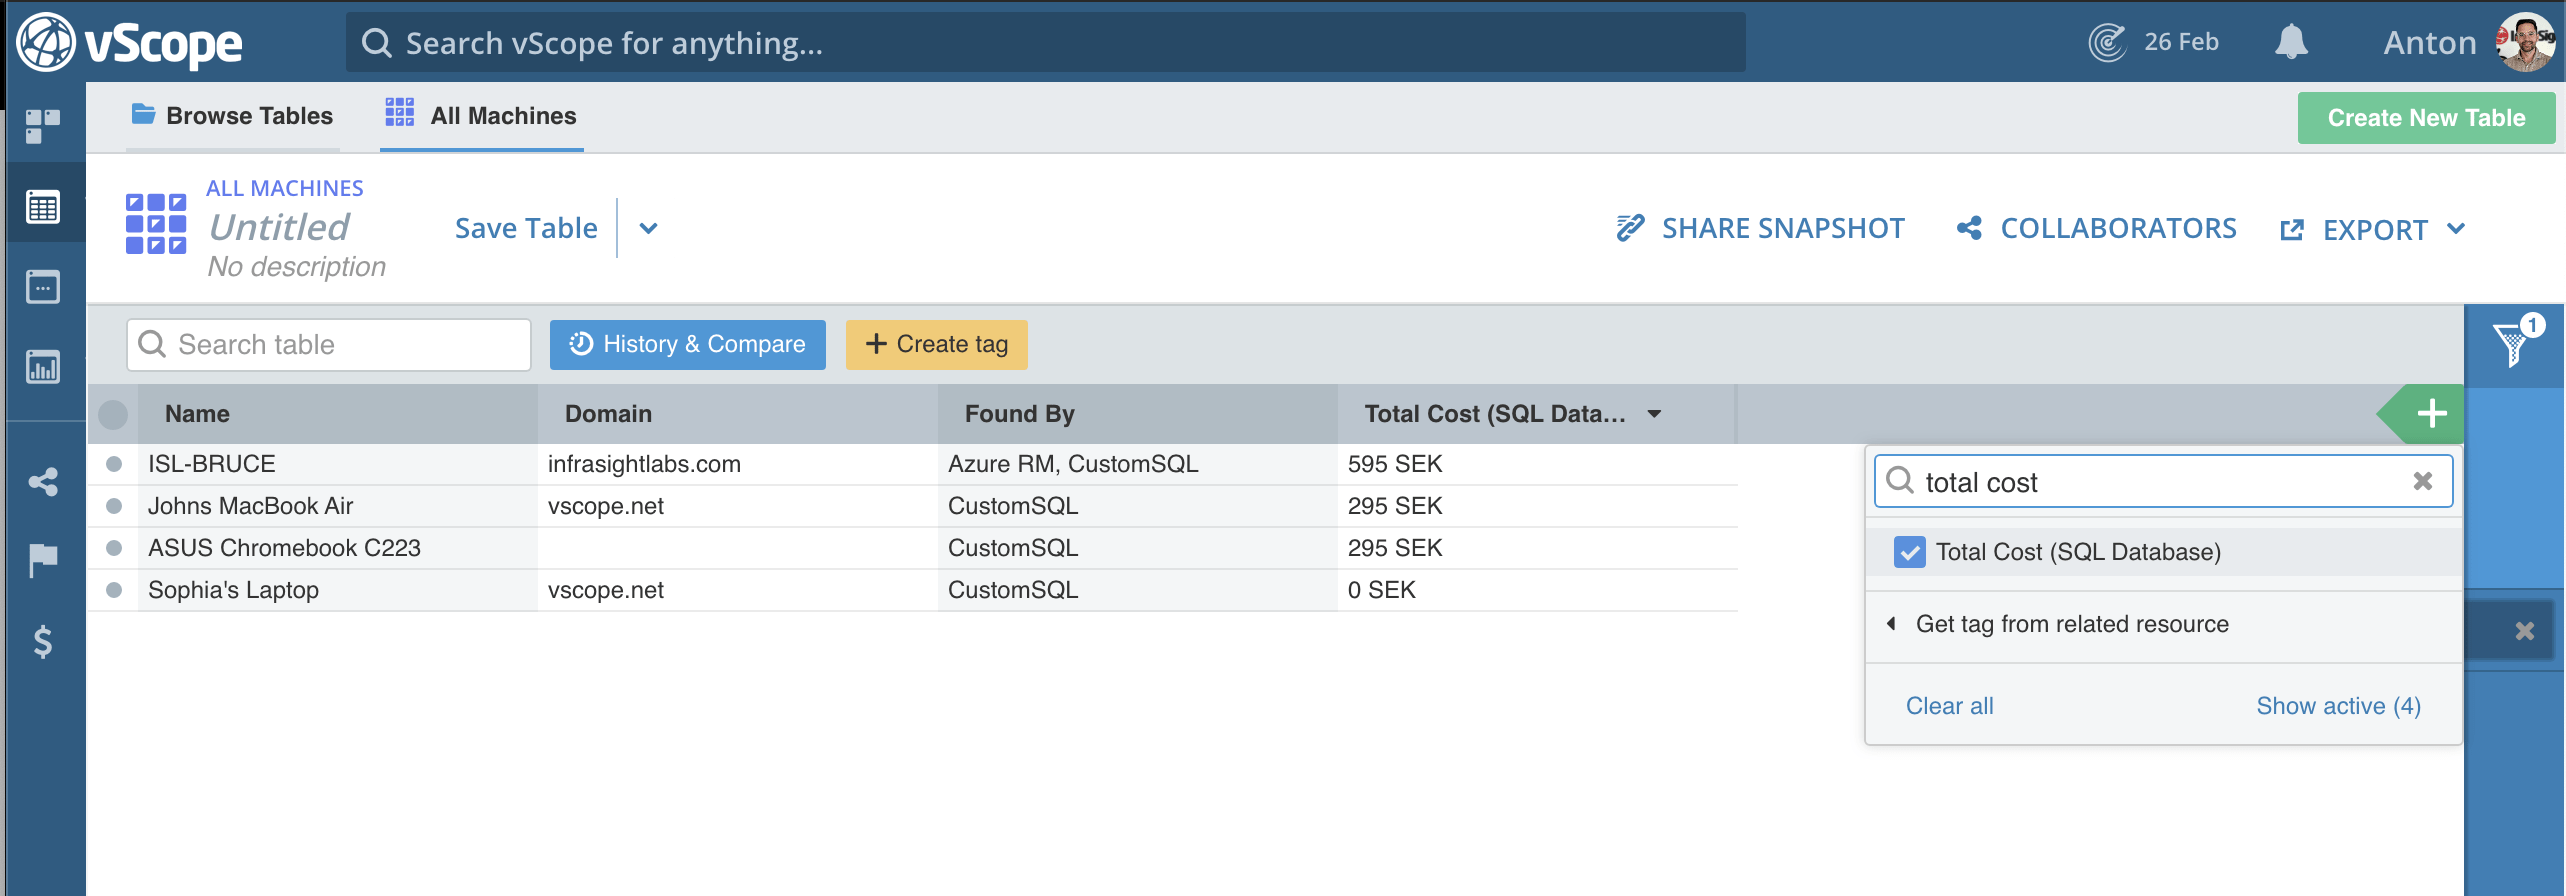
Click Create tag and once again rediscover the Custom SQL credential to have vScope to fetch the value. Now we can view the tag in a list by adding the column “Total Cost (SQL Database)“.
💡 Tips: Converting values to correct format
Sometimes you might want to import a formatted value, eg. 8 GBytes RAM. vScope will interpret the value from the data source in Bytes. This means that in your SQL query you will need to convert 8 Gbytes to bytes, ie. 8*1024*1024*1024.
Example
SELECT (RAM_GB*1024*1024*1024) FROM sql_databaseLearn more
If you want to learn more about how to use vScope you can schedule a workshop with our Customer Success team. This service is included in your subscription fee and the workshops are customized according to the needs of your organization.
